Headless CMS & SEO [2023]

Summarised a few articles about SEO and headless CMS’s below:

  • Headless SEO:
    • Refers to SEO processes when using a headless CMS.
    • Requires content modelling for SEO, intentional technical setup, and an omnichannel approach.
    • Traditional SEO tools and techniques may not automatically apply to a headless CMS.
    • Core SEO principles remain the same: provide the best content to answer user queries.

  • Three Main Aspects of Headless SEO:
    • Content Models for SEO:
      • Headless CMS decouples content from its presentation.
      • Content is treated as data, stored centrally, and can be reused.
      • Content modeling defines content types, attributes, and relationships.

  • Limited Plugins and Add-ons:
    • Can’t rely on traditional SEO plugins like Yoast.
    • SEOs have full control over technical setup.
    • Explicit technical requests to the development team are necessary.


  • Omnichannel SEO:
    • SEO now goes beyond just website optimization.
    • Includes optimizing for search engines, social media, email, and other channels.
    • SEOs must ensure consistent experiences across all channels.


  • Is Headless Better for SEO?:
    • Trade-offs exist with headless CMS.
    • Opportunities for content distribution and repurposing are larger.
    • Benefits include decoupling content from presentation and managing content in multiple languages.
    • Headless CMS can be combined with static site generators for modern web architecture.


  • Best Practices for Headless CMS SEO:
    • Meta Tags:
      • Request essential meta tags like title, meta description, meta robots, viewport, content type, Open Graph tags, and language.
      • Include validation rules for these fields.

    • URL Slug:
      • Ensure content editors can modify the URL slug.
      • Keep URLs user-friendly and keyword-rich.

    • Canonical URLs:
      • Define canonical URLs in the page’s head or HTTP header.
      • Use absolute URLs and define only one canonical URL per page.
      • Consider URL types and evaluate with the technical team for additional canonicalization rules.
    • Define your XML sitemap setup:
      • Sitemaps should be dynamic and updated regularly.
      • Option to clear sitemap cache and regenerate on demand is beneficial.
      • Include only indexable, canonical URLs with a 200 HTTP response code in the sitemap.
      • Sitemaps typically reside in the website’s root directory but can be elsewhere if indicated in the robots.txt file.
      • Sitemaps can be divided based on content types (e.g., posts, pages, authors).
      • Google often ignores <priority> and <changefreq> tags in sitemaps.
      • Sitemaps can submit non-web page content like videos, images, or news articles.

      • Request a field for schema markup:
        • Schema markup helps search engines understand content better.
        • Can be added per URL or at a content component level.
        • Enables eligibility for various rich results (e.g., breadcrumbs, video results, FAQs).
    • Ensure logical heading hierarchy:
      • Headings in a headless CMS can be tricky due to content being decoupled from layout.
      • Heading hierarchy should reflect content organization.
      • Proper hierarchy is essential for web accessibility, aiding visually impaired users.

      • Summary:
        • Headless architecture empowers businesses to control their digital experience.
        • Initial technical setup for headless SEO can be challenging but offers greater control and integration.
        • Headless SEO provides vast possibilities for content-led experiences in ecommerce and content management for large international sites.
        • The true potential of headless SEO lies in the innovative ways digital teams will harness it in the future.

  • What is a headless CMS?
    • A CMS that separates content creation and management from its presentation.
    • Offers flexibility in delivering content to various devices and platforms.
    • Results in faster loading times and personalized experiences.


  • How headless CMS works in practice:
    • Removes the need for content changes to go through the development team.
    • Content marketers can publish and edit content using familiar CMS platforms.
    • Content is sent to the main website via API integration.


  • Benefits of headless CMS for organizations and SEO:
    • Scalability: Allows rapid content production across various platforms.
    • Improved Relationships: Separation fosters better collaboration between developers and SEOs.
  • SEO-friendly Features: Includes structured data support and customizable URLs.
  • Enhanced Security: Decouples presentation from backend, shielding sensitive systems.
  • Faster Load Speeds: Reduces complexity associated with traditional CMS architectures.

  • Google’s stance on headless CMS:
    • Google is neutral about the CMS choice.
    • John Mueller, Google’s Senior Search Analyst, stated Google doesn’t look for specific CMS signals in its algorithm.
    • Headless CMS neither positively nor negatively impacts SEO directly.

  • Best practices for SEO with headless CMS:
    • Ensure schema, metadata, and URL structure are consistent.
    • Validate content for mobile-friendliness.
    • Ensure content is included in fetch and render tests.
    • Update XML sitemap with new content.

  • Conclusion:
    • Adopting a headless CMS offers numerous benefits, including improved SEO performance.
    • Understanding its workings allows organizations to leverage its advantages for content production, collaboration, security, and speed.

  • Differences between headless SEO and traditional SEO:
    • Aim: Both aim to optimize content for search intent and high SERP ranking.
    • Omnichannel content delivery:
      • Traditional SEO has content delivery restrictions.
      • Headless SEO supports omnichannel content delivery for personalized experiences across devices.

    • Presentation layer freedom:
      • Traditional solutions limit innovative front-end experiences.
      • Headless SEO offers more creative freedom.

    • Platform dependence:
      • Traditional SEO locks users into a specific CMS platform.
      • Headless SEO offers freedom to choose tools and technologies.

    • Loading speed:
      • Traditional SEO can result in slow-loading websites.
      • Headless SEO optimizes loading speed and overall performance.

  • Pros and Cons of headless SEO:
    • Pros:
      • Enhances performance: Optimizes front-end code for speed and user experience.
      • Effective at Scale: Allows independent work of developers and content teams, beneficial for large websites.
    • Cons:
      • Technical skills required: Need for developers to build the front end and manage data fetching.
      • Requires knowledge of technical SEO: Users must handle aspects like website crawlability, speed, mobile responsiveness, redirects, and more, which were typically managed by traditional CMSs.

Pros and Cons of Traditional SEO

  • Pros:
    • No need for technical expertise due to traditional CMS.
    • Reduces decision-making time as tools and integrations are predefined.
  • Cons:
    • Slow website speeds due to simultaneous loading of frontend, backend, and content.
    • Limited omnichannel content delivery and digital experiences.

Comparison: Headless SEO vs. Traditional SEO

  • Headless SEO:
    • Supports omnichannel delivery.
    • Offers freedom in tool and technology choice.
    • Faster page load times.
  • Traditional SEO:
    • Limited content delivery channels.
    • Restricted to platform’s tools and integrations.
    • Slower page load times.

SEO Best Practices for Developers

  • Use semantic HTML for better content structure.
  • Ensure websites are mobile-friendly.
  • Optimize URLs for search with clear and relevant slugs.
  • Implement schema markup for enhanced search results.
  • Use server-side rendering for better page indexing. (look into “pre-rendering JS”
  • Include essential SEO meta tags.
  • Create XML sitemaps for improved website crawlability.
  • Optimize images for faster loading and better user experience.

Conclusion

  • Components like link building and pillar pages remain consistent regardless of CMS type.
  • Headless SEO demands technical skills and in-depth SEO knowledge.
  • Combining on-page, off-page, and technical SEO with the right tools ensures optimal search engine rankings.

Technical SEO And Headless CMS

Tech Audit case study from Bizwrites.com

Background

  • Client used a headless CMS without considering marketing or SEO.
  • Headless CMS without proper planning can lead to preventable problems.
  • Traditional CMS (e.g., WordPress) covers basic SEO with plugins like Yoast.
  • Headless CMS requires developers to add specific SEO functionalities.
  • Client’s team lacked technical SEO knowledge during site development.

Approach

  • Client’s main goal: reach their ideal customer.
  • Instead of focusing on content, a technical SEO audit was recommended.
  • Preliminary look revealed numerous technical issues.
  • Decision made to prioritize technical audit over content.

Technical Issues Identified and Dealt With

  1. Irrelevant pages being crawled:
    • Over 4000 irrelevant pages crawled by Google.
    • Adjusted robots.txt and eliminated source of dynamically generated duplicate pages.
    • Result: Significant reduction in crawled but not indexed pages.
  2. Duplicate content issues:
    • No meta tag control: Duplicated page titles and meta descriptions.
      • Solution: Added a plugin for easy editing of titles and descriptions.
    • Incorrectly implemented redirects: Soft 404s caused by meta refresh redirects.
      • Solution: Use 301 redirects instead of meta refresh redirects.
    • Missing redirects: No consistent URL format, leading to multiple versions of the same page.
      • Solution: Redirected non-trailing-slash, non-WWW URL formats to the correct format.
      • Result: Eliminated duplicate content issues and improved user experience.

Results

  • Collaborated with client’s dev team for implementation.
  • Changes made within two weeks in December.
  • Significant improvements observed:
    • Avg. weekly clicks increased by 92.5%.
    • Avg. weekly impressions increased by 2.3X.
    • Total keywords the domain ranked for increased by 4.2X.
  • SEMRush’s crawl comparison showed positive technical SEO metrics.
  • Emphasized that while growth is impressive, it will eventually level out.

Key Points about SEO in the JAMStack World with a Headless CMS

  • Living in the JAMStack world doesn’t alter primary SEO priorities.
  • Migrating from a Legacy CMS to a Headless CMS offers SEO benefits related to page performance, security, user experience, and multi-platform content delivery.

  • Unlike traditional CMSs, a headless CMS doesn’t offer plug-and-play simplicity for SEO factors.
  • The main difference between traditional and headless CMS is the ability to edit metadata instantly.
  • Traditional CMSs, like WordPress or Drupal, allow easy addition of page titles, descriptions, and other meta tags.

  • Headless CMSs, such as Hygraph, require different handling due to their cross-platform flexibility.
  • Standard best practices for on-page and off-page optimization remain unchanged: quality content, keyword optimization, interlinked content, domain authority, social sharing, and reputable backlinks.
  • SEO starts with the build and technical implementations, setting the foundation for content teams.

Technical SEO Best Practices for Headless CMS

  • Ease-of-crawlability and Page Structure:
    • Use Schema.org structured data markup to enrich HTML tags, making content more understandable to search engines.
    • Structured data aids in better indexing and understanding by search engine bots.
    • Example provided: JSON-LD structured data snippet by Google for contact information.
    • Structured data can help content appear as featured snippets in search results.
  • Meta Tags:
    • Essential for describing a page’s content to search engines.
    • Four key meta tags: Title tag, Meta Description, Meta Keywords, and Meta Robots. (not sure about meta keywords – think they went out with the arc)
    • In a headless CMS like Hygraph, meta tags should be added as String fields to content models, allowing content authors to add relevant metadata.
    • Proper use of a headless CMS with these practices can enhance SEO results.
  • React or Vue:
    • While they favor fast loading, there are SEO challenges.
    • Essential to add a component for metadata.
    • React Helmet can manage metadata in React apps.
    • React Router can enhance URL structure.
    • Use Isomorphic Javascript or Prerender for better SEO with client-side JavaScript.

  • Static Site Generators (SSGs):
    • Hugo, Jekyll, and Gatsby handle major SEO challenges.
    • They offer fast loading and manage metadata effectively.
    • Gatsby has plugins like React Helmet and Sitemap.

  • Content Delivery Network (CDN):
    • Distributes content across global servers.
    • Enhances website performance and user experience.

  • Image Optimization:
    • Optimize image size in headless CMS.
    • Use Lazy Loading for images and videos.
    • Prefer SVG or WebP formats for faster loading.
    • Add Open Graph metatags for images.

  • HTTPS:
    • Upgrade to HTTPS for security and user trust.
    • HTTPS websites load faster and rank better on Google.

Setting Foundations for Content Creators

  • URL Structure:
    • Use SEO-friendly URLs like example.com/page-title-with-keywords.
    • Include target keywords in URLs.
    • Ensure content has clear tags like H1, H2, etc.

  • Content Enrichment:
    • Optimize the use of images and media for better user experience and SEO.
    • Ensure assets are resized, compressed, and have relevant file names and alt-attributes.
    • Make pages easily shareable with OpenGraph and Twitter Card meta information.
    • Shareable pages improve backlinks, referral traffic, and brand awareness.

Final Takeaway

  • Proper technical foundation is crucial before content creation for better SEO.
  • Empower content teams with the right tools and practices.
  • Continuous engagement and regular audits are essential for maintaining and improving SEO.
  • While challenges exist with headless CMS, with the right practices, SEO improvement is achievable.

References:

Search Engine Land

https://opensenselabs.com/blog/articles/omnichannel-content-delivery-guide

Bizwrites.com

Hygraph.com

In case you’re wondering what “omnichannel” means:

What is an omnichannel content approach? An omnichannel content approach is simply all about bringing together all content channels in order to make them work parallelly to improve and customize the user’s experience. 

Ordering URLs by Forward Slash Count in Excel [2023]

Paste URLs in column A (give the column a catchy title like “URLs” in cell A1)

Put this formula in cell B2:

=LEN(A2)-LEN(SUBSTITUTE(A2,"/",""))

Drag the formula down

Order – Z to A

You will now have the URLs with the most “/” at the top of column A

OfferCatalog Schema Example for eCommerce Product-Listing / Category Page [2024]

Below is an example for a webpage which lists different soccer balls for sale:

<script type="application/ld+json">

{
@context: "https://schema.org/",
@type: "OfferCatalog",
name: "Cakes for Sale",
description: "A catalog of cakes offered by our online store",
url: "https://www.example.com/all-cakes",
numberOfItems: 2,
itemListOrder: "https://schema.org/ItemListOrderAscending",
itemListElement: [{
@type: "Offer",
itemOffered: {
@type: "Product",
name: "Cake1",
image: "https://www.example.com/images/product1.jpg",
description: "Description of cake 1",
sku: "sku1",
manufacturer: "Manufacturer 1",
brand: "Brand 1",
offers: {
@type: "Offer",
price: "9.99",
priceCurrency: "USD",
availability: "https://schema.org/InStock"
}
}
}, {
@type: "Offer",
itemOffered: {
@type: "Product",
name: "Product 2",
image: "https://www.example.com/images/product2.jpg",
description: "Description of product 2",
sku: "sku2",
manufacturer: "Manufacturer 2",
brand: "Brand 2",
offers: {
@type: "Offer",
price: "199.99",
priceCurrency: "USD",
availability: "https://schema.org/InStock"
}
}
}]
}
</script>

once you’ve done your own code, you can check it using the schema testing sheet – https://docs.google.com/spreadsheets/d/1dDqJ9_qrTVoJOZRxieJDp9XE3Q1TCq4ixNVudVtgp2M/edit#gid=0

Here’s another example:

<script type="application/ld+json">

{

"@context": "http://schema.org",

"@type": "OfferCatalog",

"name": "Competition Tennis Balls",

"description": "High-quality competition tennis balls for professional and amateur players.",

"url": "https://www.example.com/tennis-la/balls/competition-tennis-balls.html",

"itemListElement": [

{

"@type": "Offer",

"itemOffered": {

"@type": "Product",

"name": "Pro Tournament Tennis Ball",

"image": "https://www.example.com/images/pro_tournament_tennis_ball.jpg",

"description": "Premium quality tennis ball designed for professional tournaments.",

"brand": "example Pro",

"sku": "NWPRO123",

"offers": {

"@type": "Offer",

"priceCurrency": "USD",

"price": "20.00",

"availability": "http://schema.org/InStock",

"url": "https://www.example.com/pro-tournament-tennis-ball.html"

}

}

},

{

"@type": "Offer",

"itemOffered": {

"@type": "Product",

"name": "Championship Level Tennis Ball",

"image": "https://www.example.com/images/championship_level_tennis_ball.jpg",

"description": "High-performance tennis ball suitable for championship level play.",

"brand": "Example La",

"sku": "NWCHAMP456",

"offers": {

"@type": "Offer",

"priceCurrency": "USD",

"price": "15.00",

"availability": "http://schema.org/InStock",

"url": "https://www.example.com/championship-level-tennis-ball.html"

}

}

}

]

}

</script>

Instead of Offercatalog, you may want to consider using CollectionPage schema…

Here’s an example of CollectionPage Schema for an eCommerce category page:

<script type="application/ld+json">


{

"@context": "http://schema.org",

"@type": "CollectionPage",

"name": "Shopify Apps",

"url": "https://sherpas.design/pages/shopify-apps",

"description": "We build apps that function and feel natively Shopify",

"image": "https://cdn.shopify.com/s/files/1/0085/8515/0560/files/logox2_500x500.png?v=1555661781",

"isPartOf": {

"@type": "WebSite",

"name": "Sherpas Design",

"url": "https://sherpas.design"

},

"relatedLink": [

"https://sherpas.design/about-us",

"https://sherpas.design/contact"

],

"mainEntity": {

"@type": "ItemList",

"itemListElement": [

{

"@type": "ListItem",

"position": 1,

"url": "http://example.com/coffee_cake.html",

"name": "Coffee Cake",

"image": "http://example.com/images/coffee_cake.jpg",

"description": "product is yummy",

"brand": "NanesBakes"

},

{

"@type": "ListItem",

"position": 2,

"url": "http://example.com/apple_pie.html",

"name": "Apple Pie",

"image": "http://example.com/images/apple_pie.jpg",

"description": "product is yummy",

"brand": "MumsCakesYo"

},

{

"@type": "ListItem",

"position": 3,

"url": "http://example.com/blueberry-pie.html",

"name": "Blueberry Pie",

"image": "http://example.com/images/blueberry_pie.jpg",

"description": "product is yummy",

"brand": "NanesBakes"

}

]

}

}

</script>

More info on CollectionPage Schema for eCommerce in my other blog post here.

Auditing Canonicals With Screaming Frog [2024]

  • TL;DR – Go to the “issues” reports – Bulk Report – Issues – All –> Export into a folder
  • View canonicals canonicalized reports

Some of the names of the reports can be confusing:

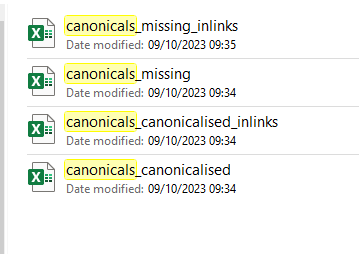
  • The “canonicals missing inlinks” report – is a list of the pages missing canonical URLs, and the inlinks to those pages
  • Canonicals Missing report – as you’d expect – shows you the pages without canonical URLs/tags
  • Canonicals Canonicalised – has pages with canonical to a different URL. So you might have example.com/help/contact – canonicalised to example.com/help – which may or may not be a problem.
  • Canonicals canonicalised inlinks – those pages with canonicals different to their own URL – the inlinks to those pages.

  • Check canonical with JS turned off (using Developer Chrome Extension) & check it remains the same
  • Check the View Source Code with and Without JS turned on – check canonical remains the same
  • Check canonical is not added using JS – this is not idea – more info here
  • Check for multiple canonical URLs using Screaming Frog and check visually in the view source code (JS rendering might be required to see all cononicals)

  • For paginated pages – check if you want each page indexed, that each different page has it’s own canonical URL
  • Check that faceted/filters on pages don’t change the canonical URL (generally you dont want them to)

Exclude these/filter out by, in this instance adding a filter in Excel – does not contain – +

Check this blog post too about auditing canonicals and Hreflang tags

Tools & Checklist for Schema [2023]

I’ve put together a spreadsheet for SEO schema checks here:

https://docs.google.com/spreadsheets/d/1dDqJ9_qrTVoJOZRxieJDp9XE3Q1TCq4ixNVudVtgp2M/edit#gid=0

Use https://classyschema.org/Visualisation and import a URL – test using different URLs, especially for eCommerce websites – like homepage, about page, product page, category pages

Test also with:

https://search.google.com/test/rich-results – add any issues in column C of sheet

and

https://validator.schema.org/ – add issues in Column D

  • Put your “to do” list in columns E and F

When using validator, make sure you’re schema has all the relevant parameters.

The separate sheets on the Google Sheet linked above, has some examples for you to check against – written in JSON-LD

Finally, if the site is already live, check the schema reports in Search Console for any errors

If you have Screaming Frog, I’d also recommend running a crawl –

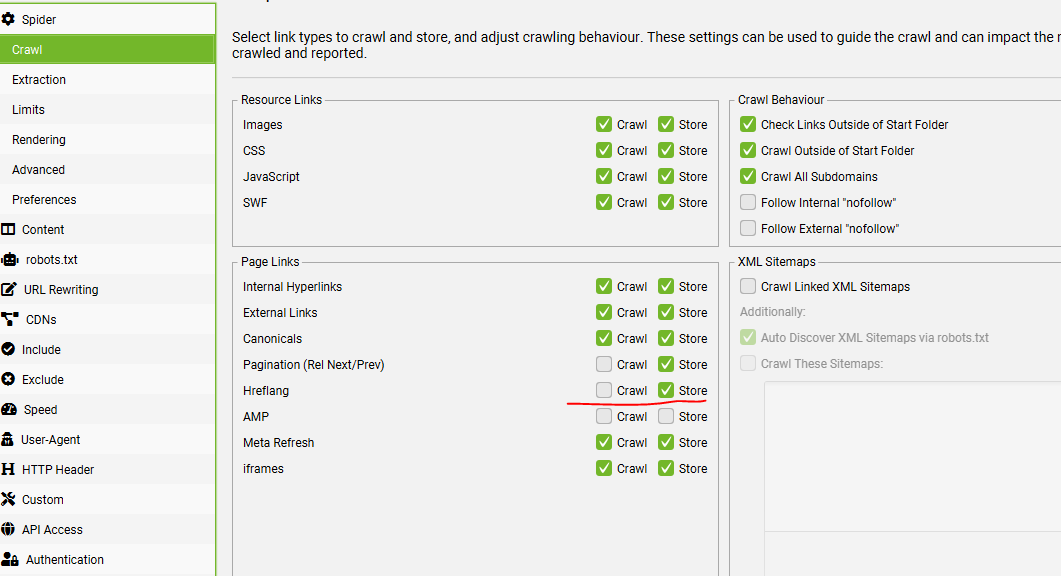
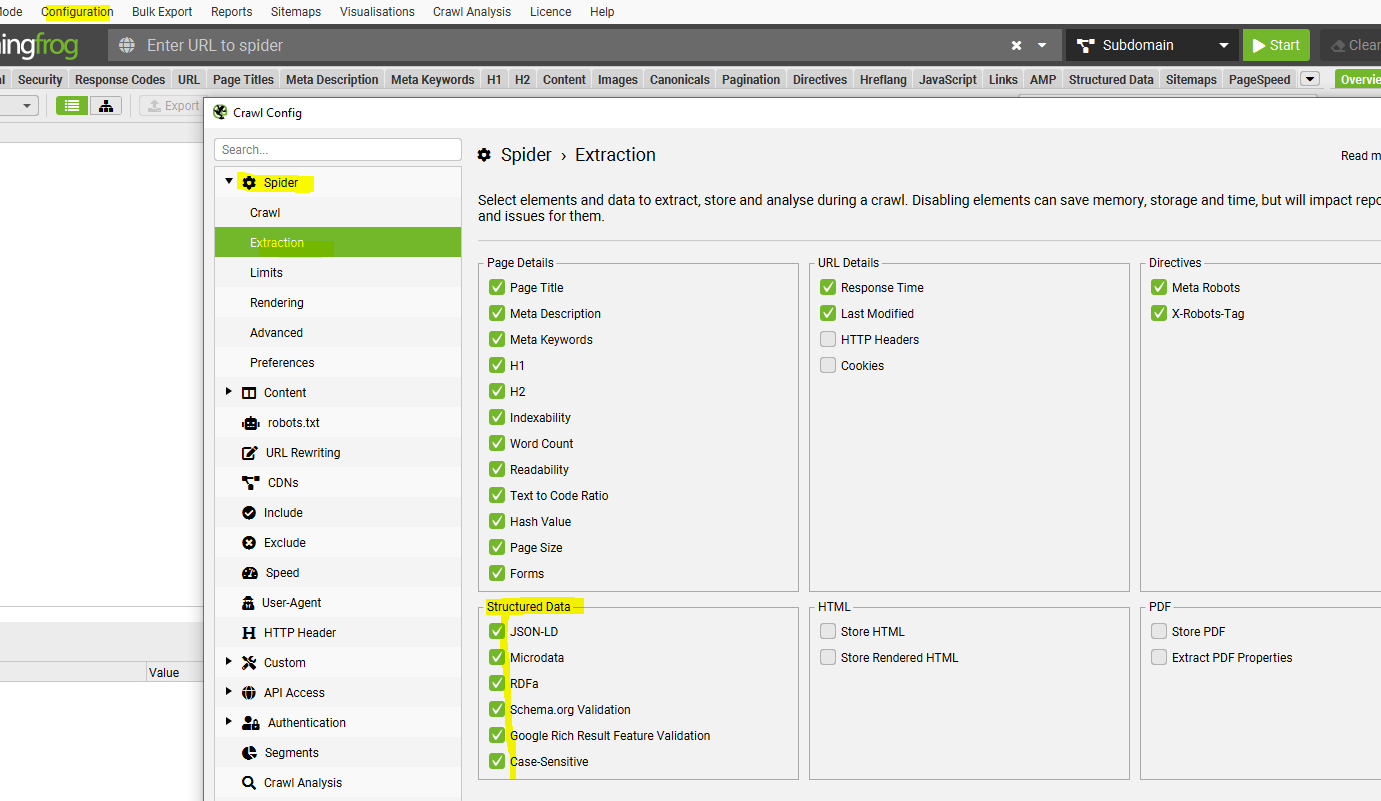
Go to Configuration – Spider – Crawl – and tick all the “Structured Data” boxes:

crawl schema in screaming frog

Then when the crawl has run – go to Reports – Structured Data and download each report

Finally, you can also check individual pages using the Ryte Structured Data Helper for Chrome –

Check with CHrome plugin – Ryte structured data helper
https://chrome.google.com/webstore/detail/ryte-structured-data-help/ndodccbbcdpcmabmiocobdnfiaaimgnk/related

CollectionPage Schema Markup Example (eCommerce)

Here’s an eCommerce example, that I found on StackOverflow:

<script type="application/ld+json">
{
  "@context" : "http://schema.org",
  "@type": "CollectionPage",
  "name": "Shopify Apps",
  "url": "https://sherpas.design/pages/shopify-apps",
  "description": "We build apps that function and feel natively Shopify",
  "image": "https://cdn.shopify.com/s/files/1/0085/8515/0560/files/logox2_500x500.png?v=1555661781",
  "mainEntity" : {
    "@type":"ItemList",
    "itemListElement":[
      {
        "@type":"ListItem",
        "position":1,
        "url":"http://example.com/coffee_cake.html",
         "name":"coffee cake"

      },
      {
        "@type":"ListItem",
        "position":2,
        "url":"http://example.com/apple_pie.html",
        "name":"apple pie"
      },
      {
        "@type":"ListItem",
        "position":3,
        "url":"http://example.com/blueberry-pie.html"
         "name":"blueberry pie"
      }
    ]
  }
}
</script>

(Thanks stackoverflow and sherpa.design)

You can add an image URL below “name” too^

Here’s an example with elatedLink and IsPartOf schema elements:

<script type="application/ld+json">

{
@context: "http://schema.org",
@type: "CollectionPage",
name: "Shopify Apps",
url: "https://sherpas.design/pages/shopify-apps",
description: "We build apps that function and feel natively Shopify",
image: "https://cdn.shopify.com/s/files/1/0085/8515/0560/files/logox2_500x500.png?v=1555661781",
isPartOf: {
@type: "WebSite",
name: "Sherpas Design",
url: "https://sherpas.design"
},
relatedLink: [
https: //sherpas.design/about-us,
https: //sherpas.design/contact
],
mainEntity: {
@type: "ItemList",
itemListElement: [{
@type: "ListItem",
position: 1,
url: "http://example.com/coffee_cake.html",
name: "Coffee Cake",
image: "http://example.com/images/coffee_cake.jpg"
}, {
@type: "ListItem",
position: 2,
url: "http://example.com/apple_pie.html",
name: "Apple Pie",
image: "http://example.com/images/apple_pie.jpg"
}, {
@type: "ListItem",
position: 3,
url: "http://example.com/blueberry-pie.html",
name: "Blueberry Pie",
image: "http://example.com/images/blueberry_pie.jpg"
}]
}
}
</script>

Here’s an example with a “description” and “brand” – please note – Brand should really be used with Product Schema:

<script type="application/ld+json">

{
"@context": "http://schema.org",
"@type": "CollectionPage",
"name": "Shopify Apps",
"url": "https://sherpas.design/pages/shopify-apps",
"description": "We build apps that function and feel natively Shopify",
"image": "https://cdn.shopify.com/s/files/1/0085/8515/0560/files/logox2_500x500.png?v=1555661781",
"isPartOf": {
"@type": "WebSite",
"name": "Sherpas Design",
"url": "https://sherpas.design"
},
"relatedLink": [
"https://sherpas.design/about-us",
"https://sherpas.design/contact"
],
"mainEntity": {
"@type": "ItemList",
"itemListElement": [
{
"@type": "ListItem",
"position": 1,
"url": "http://example.com/coffee_cake.html",
"name": "Coffee Cake",
"image": "http://example.com/images/coffee_cake.jpg",
"description": "product is yummy",
"brand": "NanesBakes"
},
{
"@type": "ListItem",
"position": 2,
"url": "http://example.com/apple_pie.html",
"name": "Apple Pie",
"image": "http://example.com/images/apple_pie.jpg",
"description": "product is yummy",
"brand": "MumsCakesYo"
},
{
"@type": "ListItem",
"position": 3,
"url": "http://example.com/blueberry-pie.html",
"name": "Blueberry Pie",
"image": "http://example.com/images/blueberry_pie.jpg",
"description": "product is yummy",
"brand": "NanesBakes"
}
]
}
}
</script>

You can add products as the ‘listitems”, although I’m not 100% sure this is best practice:

<script type="application/ld+json">

{
"@context": "http://schema.org",
"@type": "CollectionPage",
"name": "Shopify Apps",
"url": "https://sherpas.design/pages/shopify-apps",
"description": "We build apps that function and feel natively Shopify",
"image": "https://cdn.shopify.com/s/files/1/0085/8515/0560/files/logox2_500x500.png?v=1555661781",
"isPartOf": {
"@type": "WebSite",
"name": "Sherpas Design",
"url": "https://sherpas.design"
},
"relatedLink": [
"https://sherpas.design/about-us",
"https://sherpas.design/contact"
],
"mainEntity": {
"@type": "ItemList",
"itemListElement": [
{
"@type": "Product",
"position": 1,
"url": "http://example.com/coffee_cake.html",
"name": "Coffee Cake",
"image": "http://example.com/images/coffee_cake.jpg",
"description": "product is yummy",
"brand": "NanesBakes"
},
{
"@type": "Product",
"position": 2,
"url": "http://example.com/apple_pie.html",
"name": "Apple Pie",
"image": "http://example.com/images/apple_pie.jpg",
"description": "product is yummy",
"brand": "MumsCakesYo"
},
{
"@type": "Product",
"position": 3,
"url": "http://example.com/blueberry-pie.html",
"name": "Blueberry Pie",
"image": "http://example.com/images/blueberry_pie.jpg",
"description": "product is yummy",
"brand": "NanesBakes"
}
]
}
}
</script>

If you are going to embed “Product” schema within itemlist – validator suggests removing the “position” element:

<script type="application/ld+json">

{

"@context": "http://schema.org",

"@type": "CollectionPage",

"name": "Shopify Apps",

"url": "https://sherpas.design/pages/shopify-apps",

"description": "We build apps that function and feel natively Shopify",

"image": "https://cdn.shopify.com/s/files/1/0085/8515/0560/files/logox2_500x500.png?v=1555661781",

"isPartOf": {

"@type": "WebSite",

"name": "Sherpas Design",

"url": "https://sherpas.design"

},

"relatedLink": [

"https://sherpas.design/about-us",

"https://sherpas.design/contact"

],

"mainEntity": {

"@type": "ItemList",

"itemListElement": [

{

"@type": "Product",

"url": "http://example.com/coffee_cake.html",

"name": "Coffee Cake",

"image": "http://example.com/images/coffee_cake.jpg",

"description": "product is yummy",

"brand": "NanesBakes"

},

{

"@type": "Product",

"url": "http://example.com/apple_pie.html",

"name": "Apple Pie",

"image": "http://example.com/images/apple_pie.jpg",

"description": "product is yummy",

"brand": "MumsCakesYo"

},

{

"@type": "Product",

"url": "http://example.com/blueberry-pie.html",

"name": "Blueberry Pie",

"image": "http://example.com/images/blueberry_pie.jpg",

"description": "product is yummy",

"brand": "NanesBakes"

}

]

}

}

</script>


Here’s is another example – but with more “Product” schema categories/elements – This is now pretty comprehensive, but we could also include “Review”review” “aggregateRating” and “PriceValidUntil”

<script type="application/ld+json">

{
"@context": "http://schema.org",
"@type": "CollectionPage",
"name": "Cakes",
"url": "https://food.com/all-cakes",
"description": "We build cakes that function and feel natively welsh",
"image": "https://cdn.shopify.com/s/files/1/0085/8515/0560/files/logox2_500x500.png?v=1555661781",
"isPartOf": {
"@type": "WebSite",
"name": "Sherpas Design",
"url": "https://sherpas.design"
},
"relatedLink": ["https://food.design/about-us", "https://food.design/contact"],
"mainEntity": {
"@type": "ItemList",
"itemListElement": [{
"@type": "Product",
"url": "http://example.com/coffee_cake.html",
"name": "Coffee Cake",
"image": "http://example.com/images/coffee_cake.jpg",
"description": "product is yummy",
"brand": "NanesBakes",
"sku": "sku1",
"manufacturer": "Manufacturer 1",
"offers": {
"@type": "Offer",
"price": "99.99",
"priceCurrency": "USD",
"availability": "https://schema.org/InStock"
}
}, {
"@type": "Product",
"url": "http://example.com/apple_pie.html",
"name": "Apple Pie",
"image": "http://example.com/images/apple_pie.jpg",
"description": "product is yummy",
"brand": "MumsCakesYo",
"sku": "sku2",
"manufacturer": "Manufacturer 2",
"offers": {
"@type": "Offer",
"price": "99.99",
"priceCurrency": "USD",
"availability": "https://schema.org/InStock"
}
}, {
"@type": "Product",
"url": "http://example.com/blueberry-pie.html",
"name": "Blueberry Pie",
"image": "http://example.com/images/blueberry_pie.jpg",
"description": "product is yummy",
"brand": "NanesBakes",
"sku": "sku3",
"manufacturer": "Manufacturer 3",
"offers": {
"@type": "Offer",
"price": "99.99",
"priceCurrency": "USD",
"availability": "https://schema.org/InStock"
}
}]
}
}
</script>

SEMRush Guide to the Basics (2023)

SEMRush Tech Audit

Use the tech audit to keep an eye on your website.

You’ll need a Google Search Console account to do an SEMRush tech audit.

Go to “site Audit” near the bottom of the side-menu on the left and then click the “+project” button.

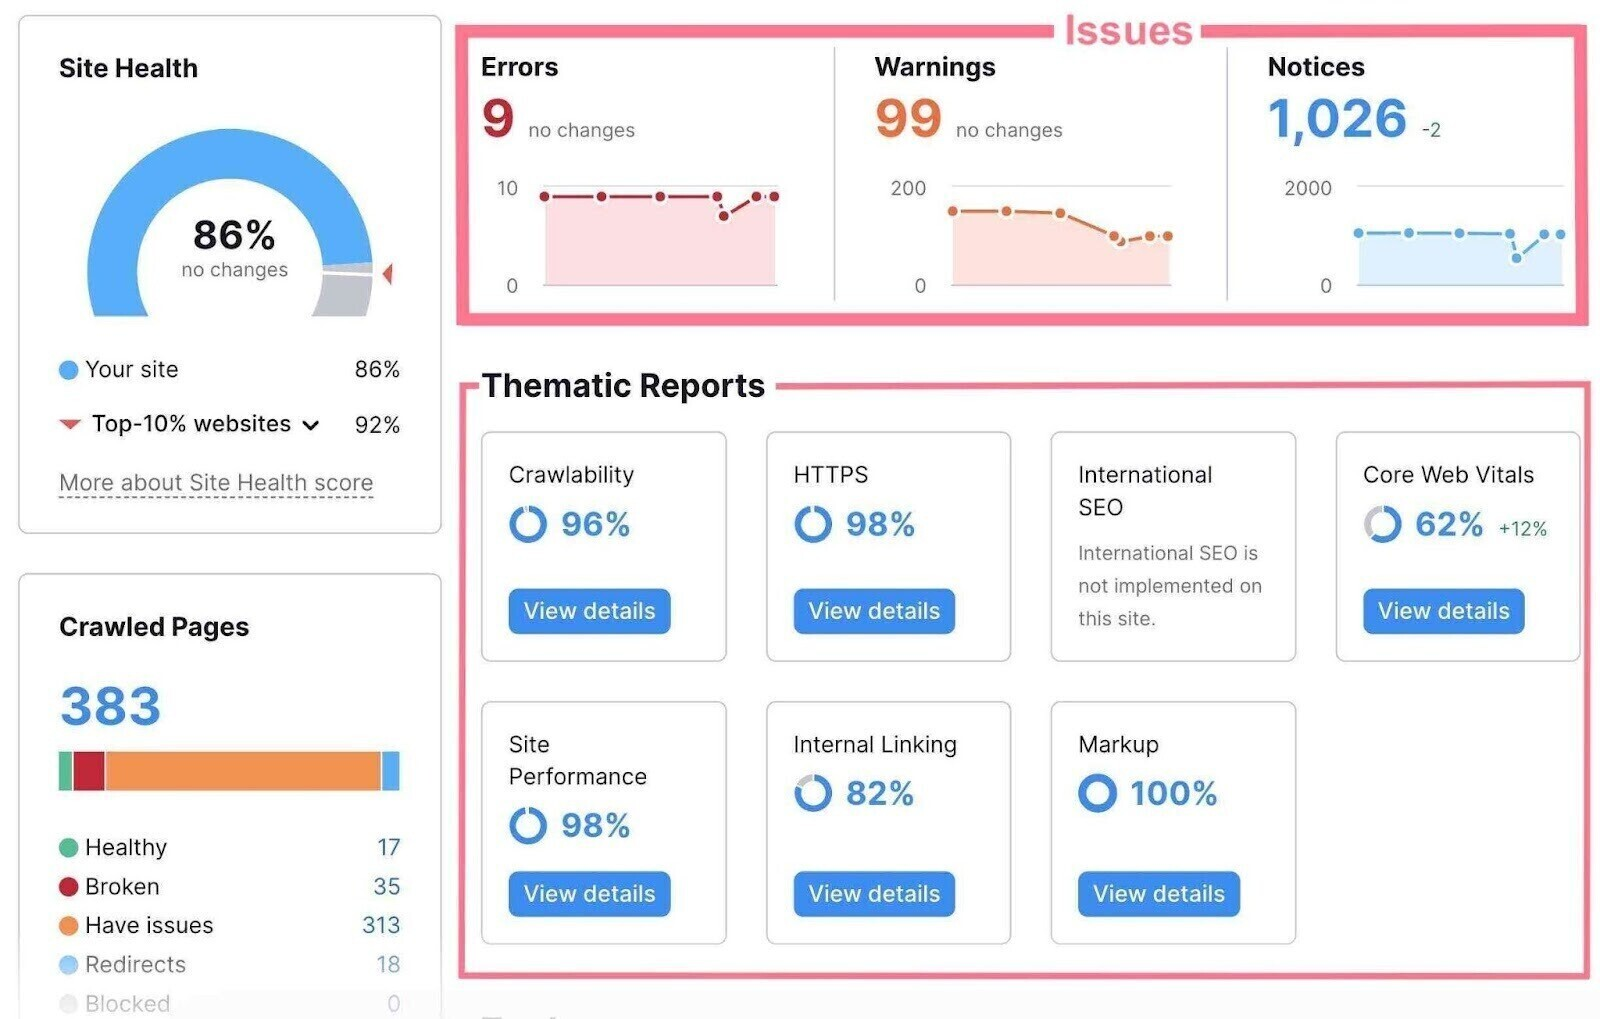
Once the site audit has been carried out, you’ll get a load of metrics that score the health of your website from a tech SEO perspective.

Image from SEMRush.com

Check the notices, warnings and errors, to see what you need to fix.

More info in this blog post.

SEMRush Keyword Gap

Keyword gap – add competitors, see what they are ranking for, that you are not.

Filter by search volume of keywords and keyword difficulty.

Keyword gap is also good for Google ads insights. If a keyword is les than a few dollars per click, but is transactional and difficult to rank for organically, it might be worth bidding on in Google ads.

On Page SEO Checker

Gives you ideas including top pages to optimize.

suggests keywords to include on specific pages

suggests backlinks to go after

UX issues can be flagged here too – connect Google analytics. Check out pages with high bounce rate and short time on site.

Organic Traffic insights

Connect Google analytics and search console

Here, you can see pages with good and bad UX metrics and the keywords driving traffic

You can also see which keywords each page ranks for.

Use this report to decide if you should include other keywords on a given page – in the page’s existing content, or create new, more specific pages.

Domain overview

Key metrics, shown at the top include bounce rate and average time on site.

You can see your own, or competitors top pages in terms of traffic

See traffic sources- what percentage of traffic is direct, coming from social media etc. (you may have to click on “Traffic Analytics” in the side menu to see this)

You can compare domain metrics to another competitors, or your own website.

You can use Bulk Analysis to enter up to 100 domains to examine.

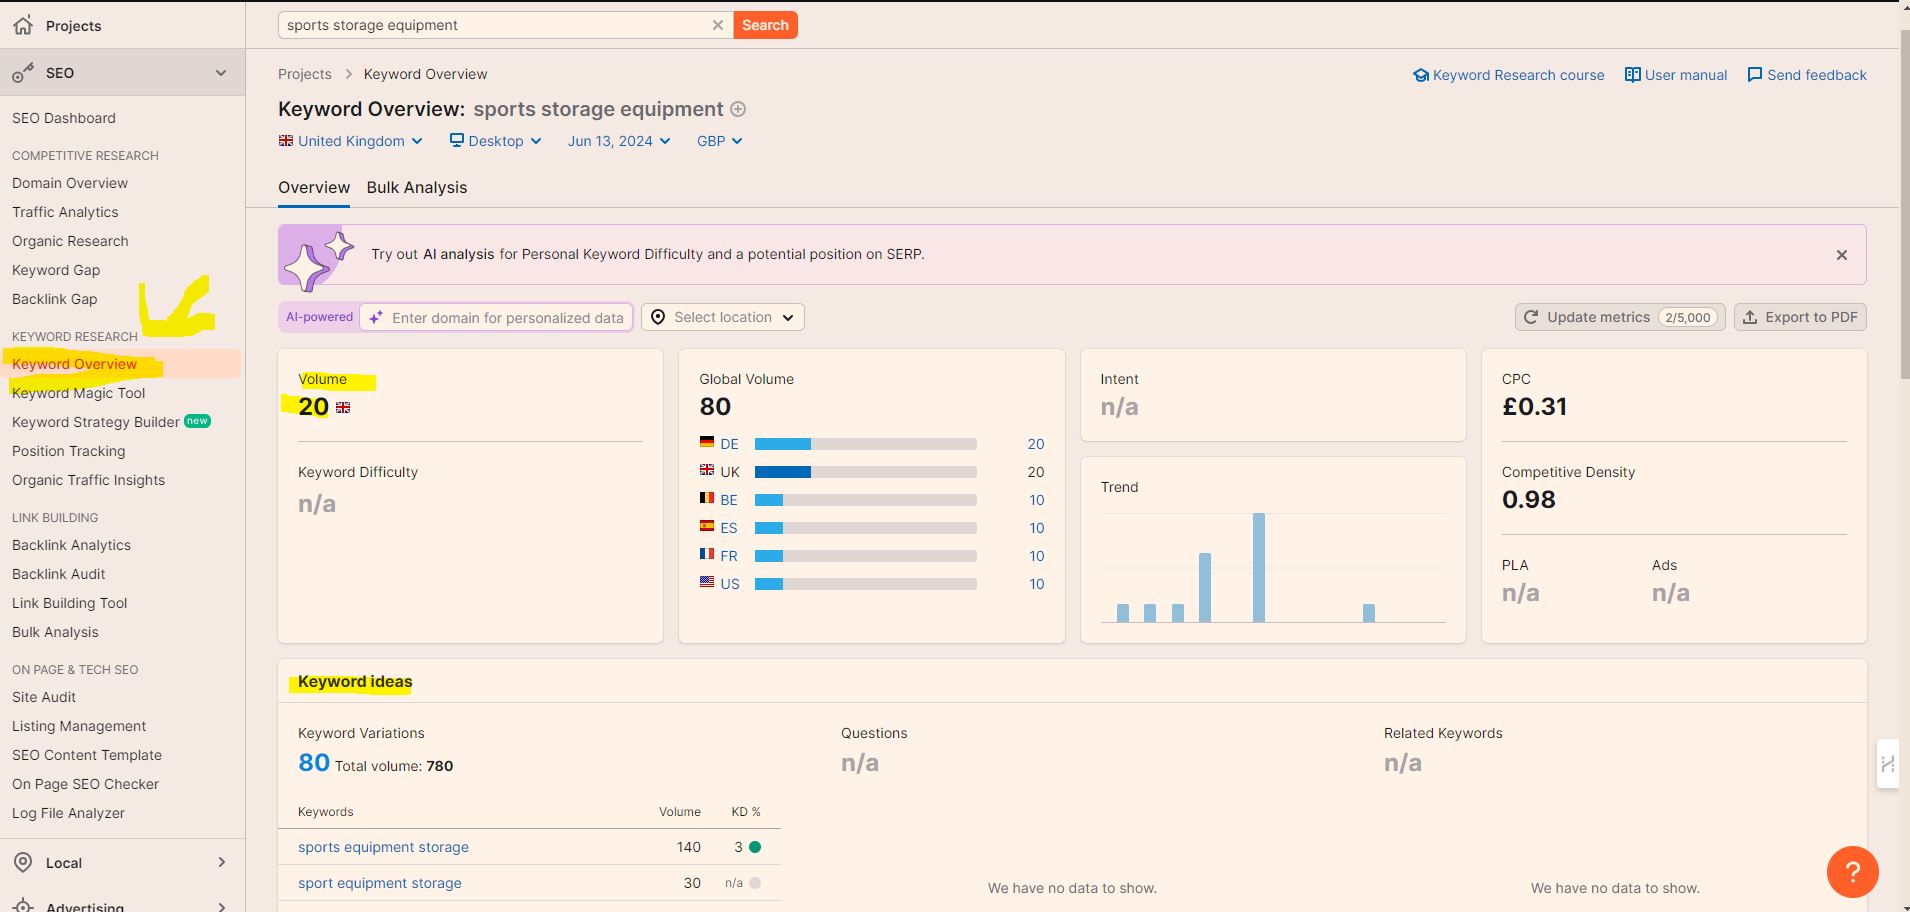
Keyword overview tool

Good for finding head/seed keywords.

Can view the Google SERPs and see what the competition for a given keyword is like

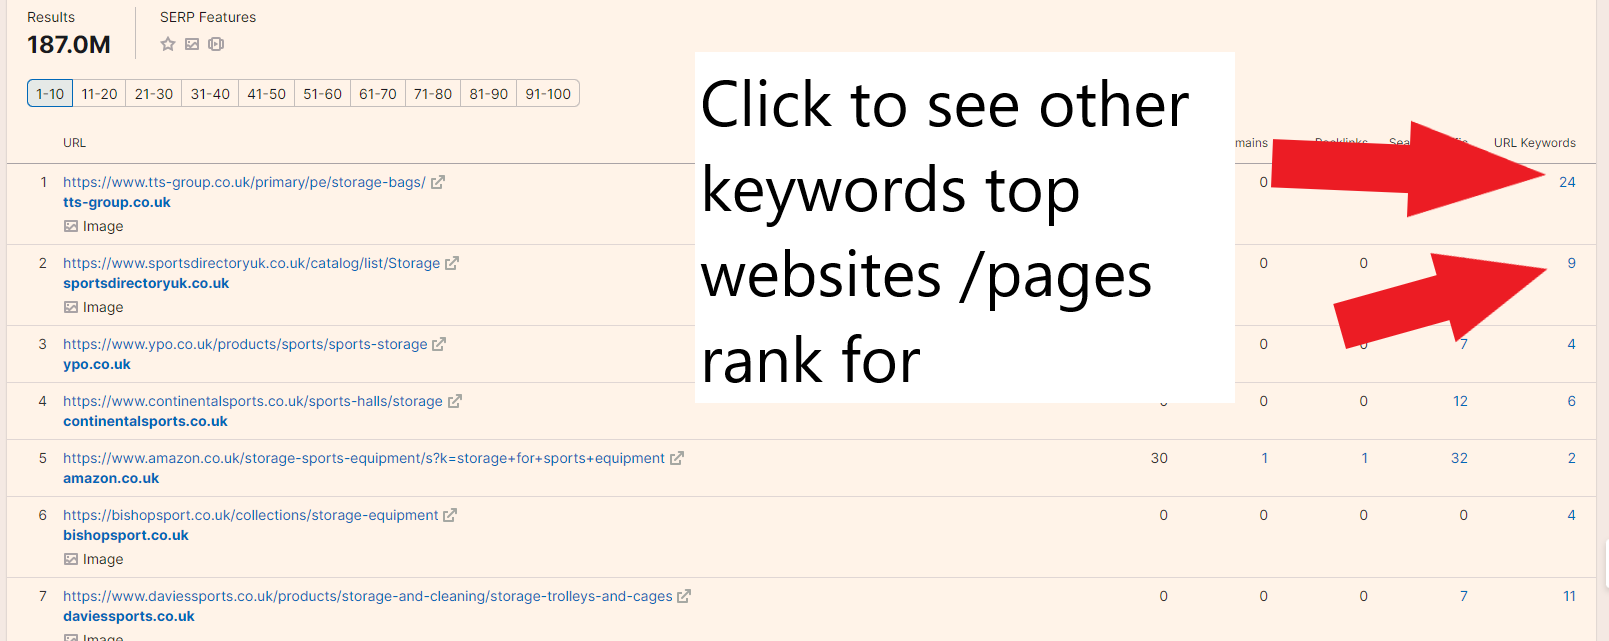
See what other keywords competitors are ranking for, on a given URL:

You can see questions related to/containing a given keyword

You can see international search volume for a keyword.

Related keywords are shown too – e.g. “football supplies” is related to “football equipment”

See SERP Features – what rich snippets etc are showing in the SERPs.

Keyword Magic tool

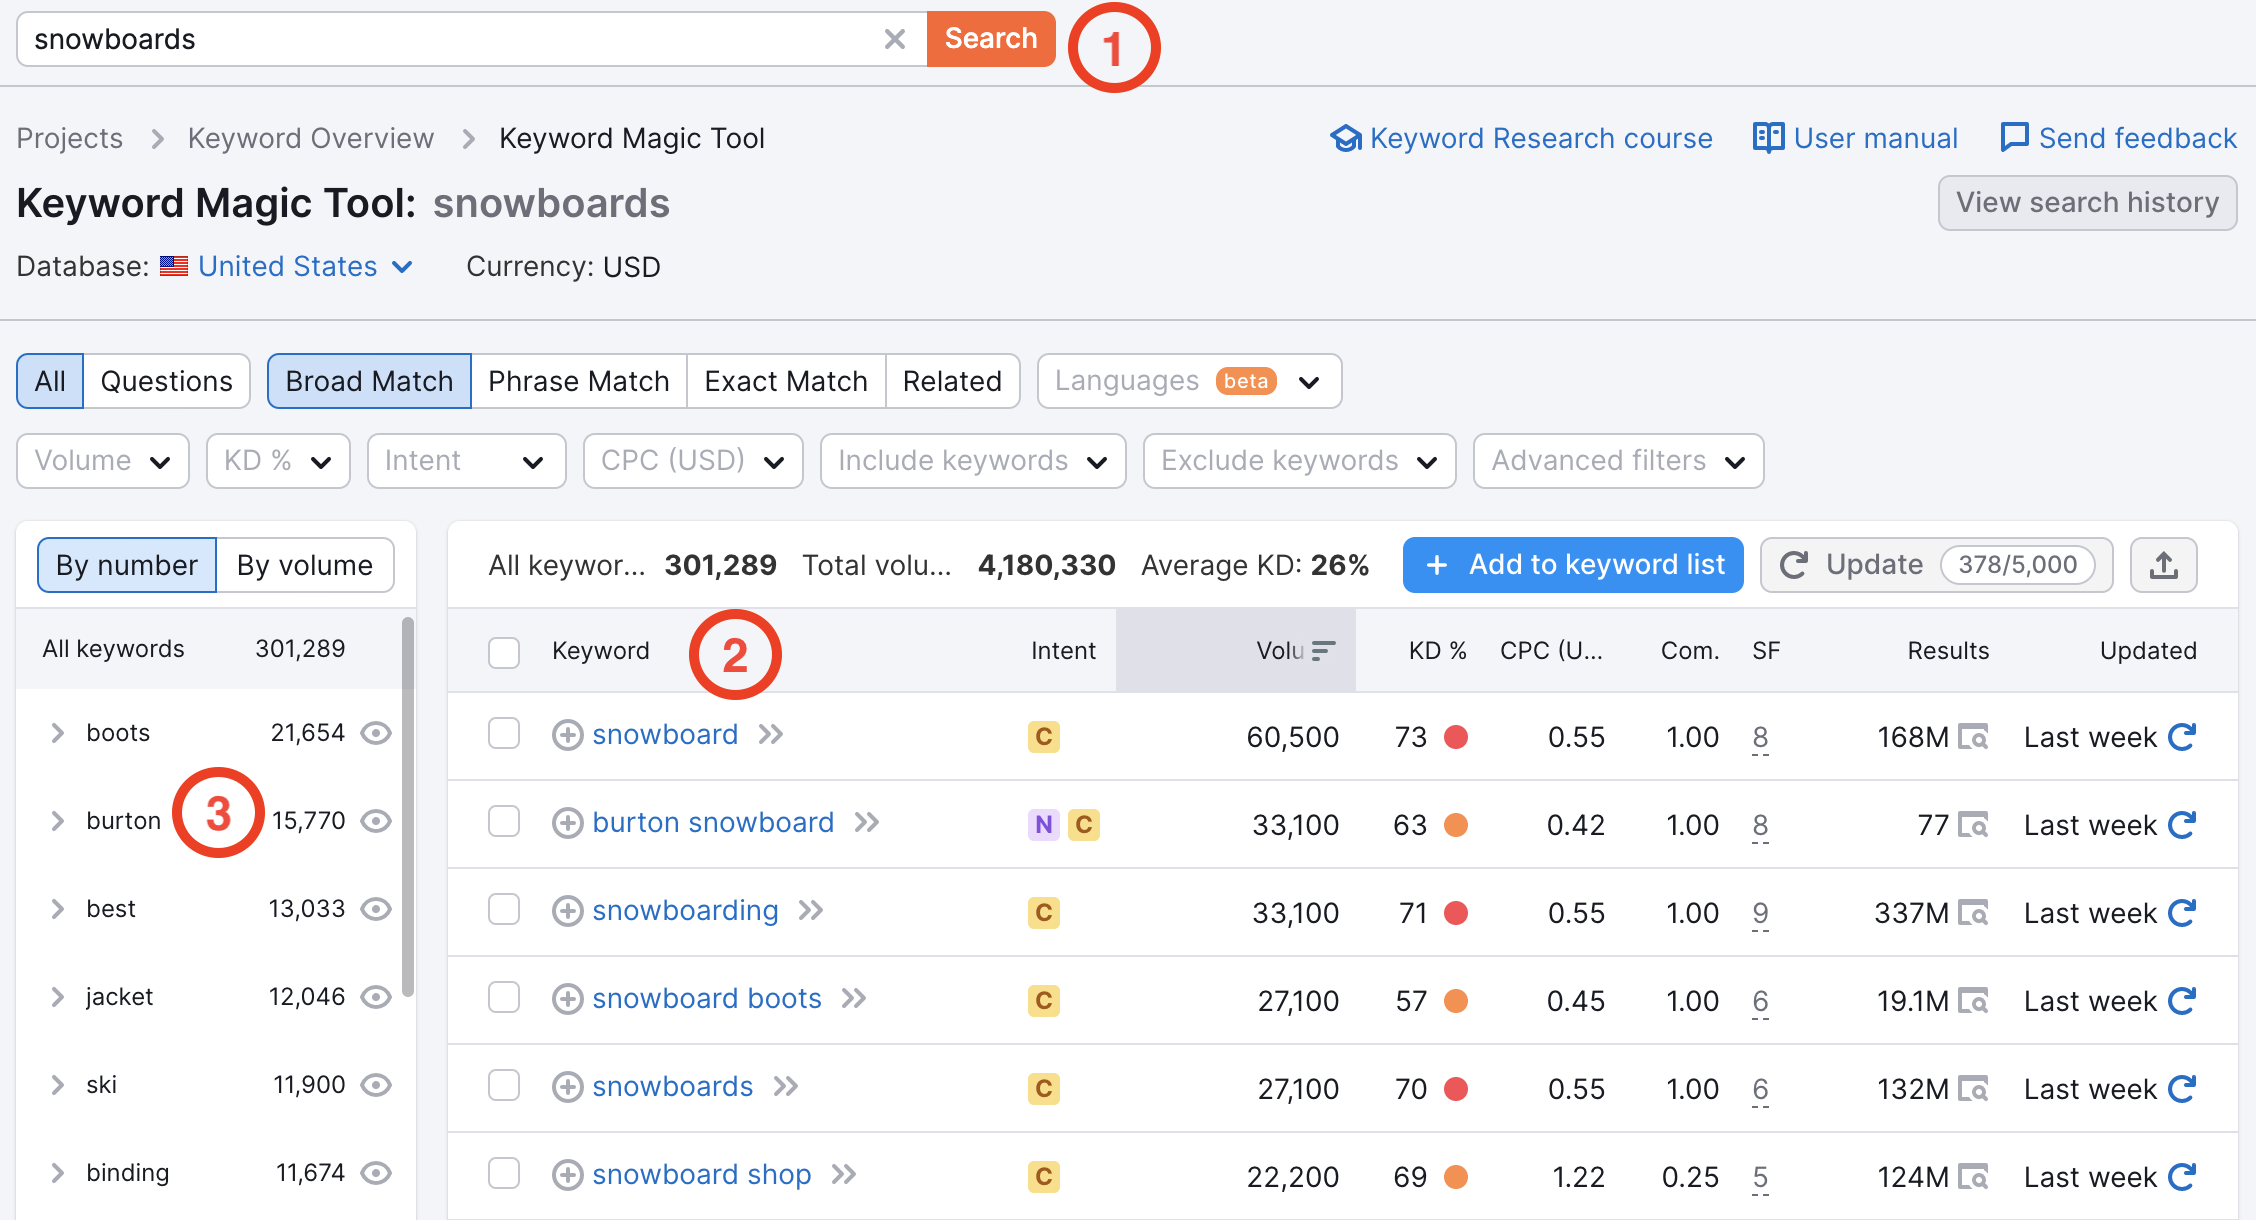
Start with a seed keyword

by default the report will give you broad match keywords.

Be sure to check out “related” match types (all keywords is also helpful)

For KW research – click on one of the main head KWs – and see what keywords your competitors rank for
(clicking on the keyword takes you to the Keyword Overview tool – scroll down to SERP Analysis)

You can add your selected keywords to a list.

More info in the semrush blog post about the tool.

Content marketing

topic research – add a keyword to get topic ideas

For example, if you enter “football equipment” (in the US) the tool gives lots of article ideas around “shoulder pads”, “football helmets”, “football cleats” etc.

Sometimes you get random ideas that you would never have thought of, like the searches around the dog called “pickle” when you look for topic ideas about Pickleball

  • There is loads more you can do with SEMRush, including position tracking. I’ll cover these additional tools in dedicated blog posts.

Keyword Manager

If you have a big list of keywords you want to get search volume for, I like to click “create a regular list” and then name the list and click “Add keywords” in the top right of the screen

Also handy if you’ve done keyword research for one country and need the search volumes for another country

Chrome Develop Tools – for SEO (2023) (inspect element)

For SEO checks you can use in a tech audit, please see table newr the bottom of this post.

Notes from this course on Udemy

Introduction to the Elements Panel

You can view code in Chrome, by right-clicking on a webpage and clicking “view page source”

You can see the code of the page, but you can’t do much with it.

Instead, you can right click and choose “developer tools”

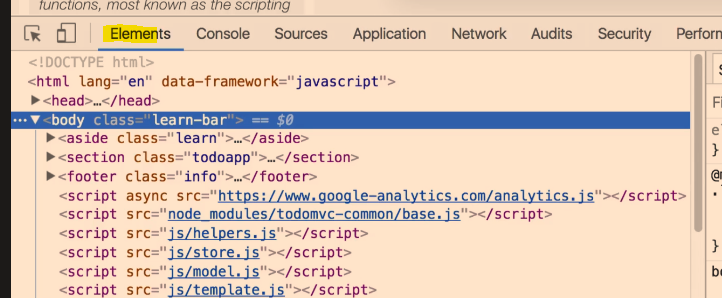
The elements panel is normally the default panel that you see:

As you hover over items in the Elements tab, it will highlight the relevant part of the webpage too.

You can right-click and choose “Inspect Element” and the Dev Tools window will open up, with the relevant piece of HTML code highlighted.
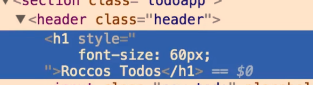
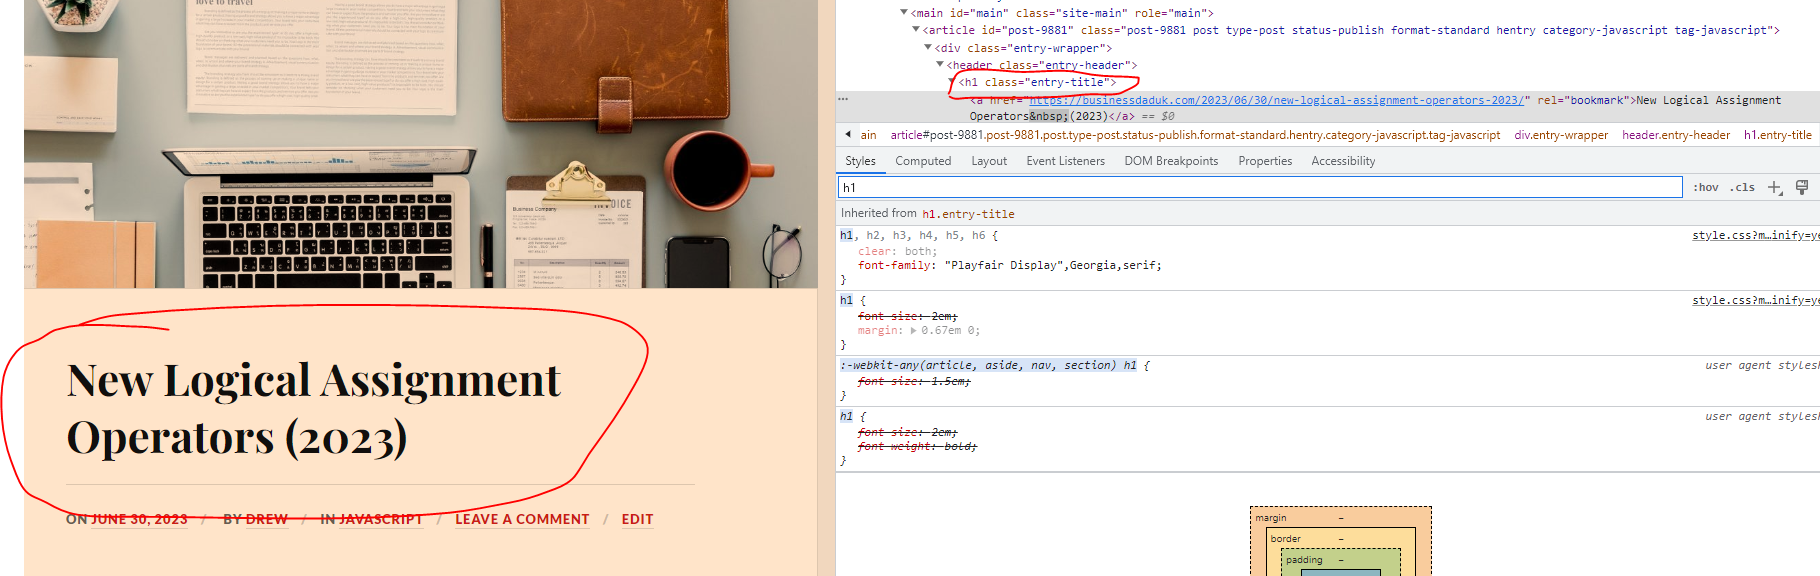
For example, if you click the main header of a page, and choose “Inspect Element”, there’s a good chance you’ll be taken to the elements tab and have a “<h1>” highlighted.

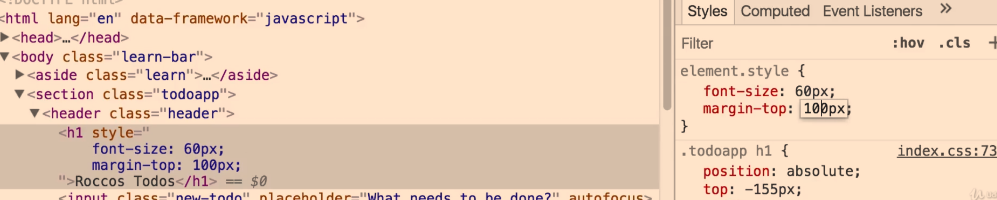
You can change the text if you like, and the style – by typing and editing it in the styles panel on the right:

You can click the “+” symbol to add a new style (I couldn’t be arsed putting this screen snippet into Paint to used proper type-text):

  • You can right click > Inspect an element and click the delete key to get rid of a style
  • Click on the colour picker to get a eye-dropped tool and other colour-picker options to change colours used on the webpage:

Chrome Developer Tools

Click the mobile icon – to see a website previewed on a mobile phone – you can change the phone model with the drop down menu

Console Tab

You can type console.log javascript code. This allows you to see the output of JavaScript code.

Web developers log messages for 2 general reasons:

Sources Tab

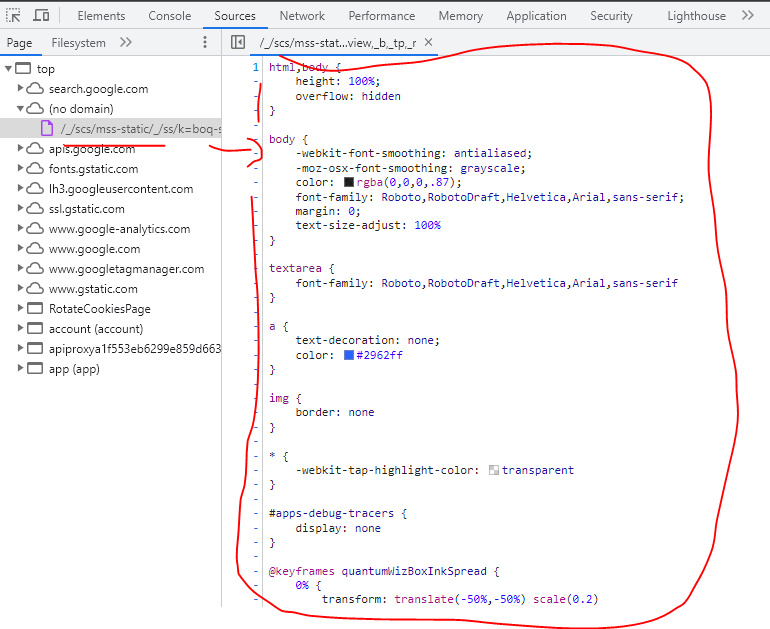
Files and folders that have been loaded by the webpage, can be found in the Sources tab – e.g. type Jquery to see if a page is using jquery

It’s often used for debugging JavaScript:

“Top” – The top-level, such as top on the screenshot above, represents an HTML frame. You’ll find top on every page that you visit. top represents the main document frame. (more info here)

The second-level, such as developers.google.com on the screenshot above, represents an origin.

The third-level, fourth-level, and so on, represent directories and resources that were loaded from that origin. For example, on the screenshot above, the full path to the resource devsite-googler-button is developers.google.com/_static/19aa27122b/css/devsite-googler-button.

  • You can click individual files to view them in the preview pane in the middle:
  • Edit CSS and JavaScript

You can edit code and see the changes immediately on the webpage

Image from Developer.chrome.com

CSS changes take effect immediately, no save needed. For JavaScript changes to take effect, press Command+S (Mac) or Control+S (Windows, Linux). DevTools doesn’t re-run a script, so the only JavaScript changes that take effect are those that you make inside of functions.

  • You can save snippets of code and run them on any page

Application Tab

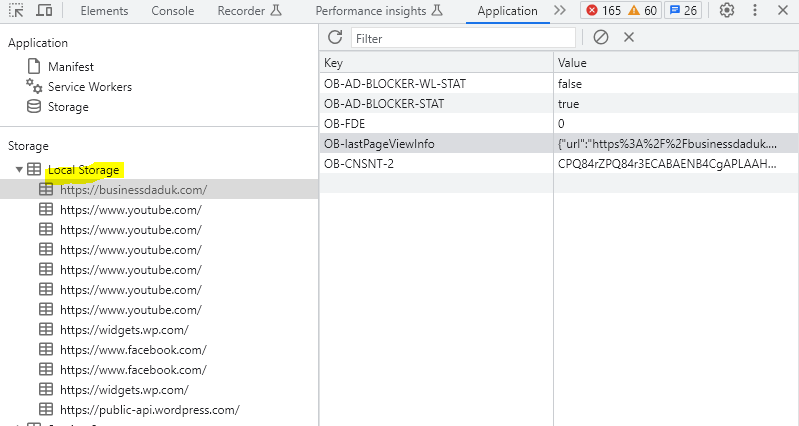
See local storage – Open the local storage section – you can see, well the local storage:

I have no fucking idea what any of this stuff means at the time of writing. I think the {“url” etc is some type of JSON

Screenshot from Mozilla

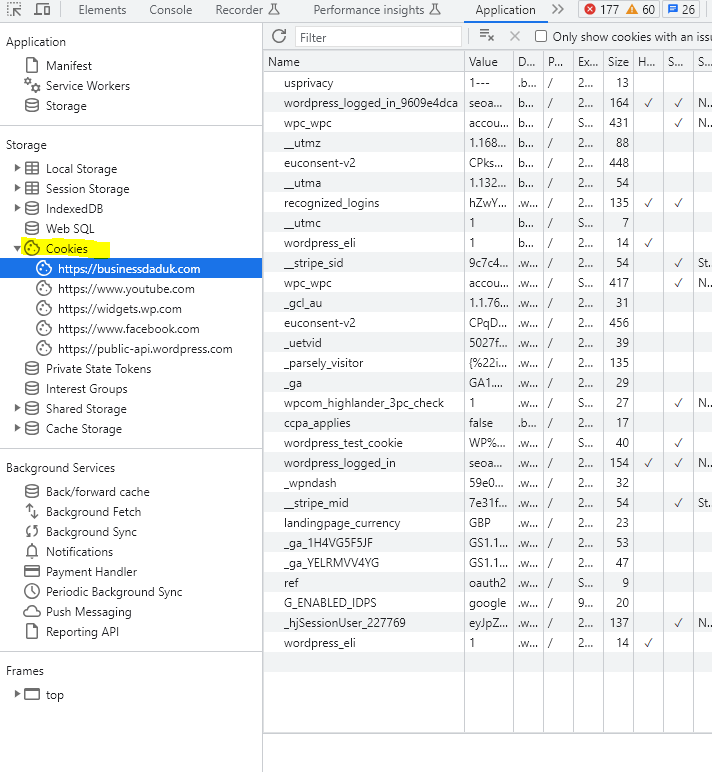
  • Cookies

You can also see what cookies are loaded:

Screenshot source

Network Tab

Shows a timeline of all the assets that are loaded

Security Tab

You can view security info, like info about the secure certificate/server/https thing

Audits Tab – This doesn’t exist anymore – use Lighthouse/Performance Insights Tab

SEO Checks Using Chrome Dev Tools

Notes from SearchEngineJournal article

1. Check If You Content Is Accessible

The DOM – can be seen in the Elements Tab of Inspect-Element, allows you to:

  • Review various content elements includng meta title
  • Verify if Google can crawl it
  • A key thing to look for here is the differences between source-code and the contents of the elements tab.

    Fucking JavaScript
    When auditing websites that have heavy JavaScript usage, content – such as page headers – sometimes appears fine in the HTML source code. But if injected via JavaScript, it may just show as a JS block in the Elements tab.

This can potentially be an issue, later verified through performing a site:example.com/page “content you’re looking for” advanced search and checking the cached version of the page.

The blog heading here, appears to be fine and stuff:

2. Check on mobile devices

Use the mobile icon on the top menu-bar, next to the “elements | Console” tab options, to see the page in different mobile devices

3. Site Speed

This can really be useful if you’ve blocked your staging website and 3rd party tools can’t access your URL

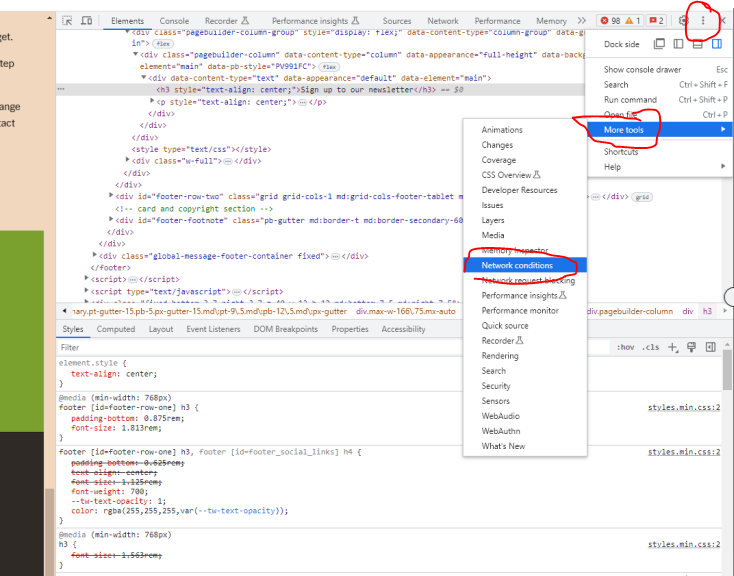
From the three-dot burger menu in the top right of the screen, you can access Network Conditions (found under More Tools).

you can throttle the network to slow 3G etc

Disable broswer cache

You can also select from a number of user agents ranging from Googlebot Smartphone through to various Microsoft Edge UAs, and Opera.

Once you have setup the setting for the network – go to the NetWork Tab, and see the page load

4. Render Blocking Resources

As mentioned previously, from the Network tab you can identify which JavaScript and CSS resources are being loaded before the DOM.

While this isn’t necessarily an issue on all websites, having resources load ahead of the DOM can potentially lead to it being blocked, which is one of the more common and resolvable site speed issues.

These can be identified by filtering for JS and CSS in the Network tab:

  • You can also see which elements, JS, CSS etc have a 200 status code, and which 404 or are blocked

Notes from another SearchEngineJournal Article

Switch Your User-Agent

In order to switch your user-agent in Chrome, use the Network Conditions tab in the console drawer.

Sometimes security measures on a website might stop Googlebot from crawling

Using the User-Ageny tool in dev tools, it’s possible to see if bots are getting blocked

Diagnosing Core Web Vitals in DevTools

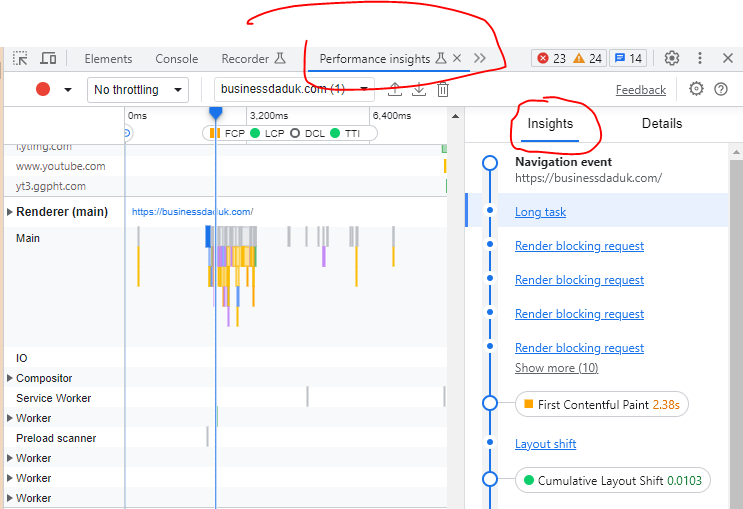
Within the timings section, users can see flags for things like FCP (First Contentful Paint), and LCP (Largest Contentful Paint), one of our Core Web Vitals.

In hovering over the flag for LCP, we can actually see the piece of content flagged to be the largest contentful paint during the page load.

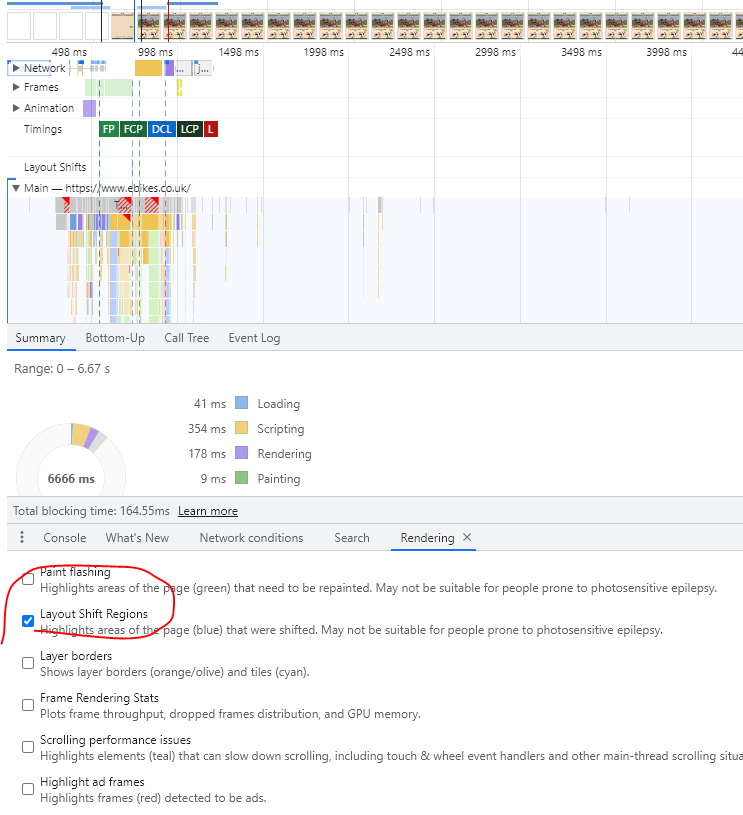
In order to help detect layout shift, use the Rendering tab in the console drawer:

Check the option for Layout Shift Regions, which will highlight areas of the page that undergo a layout shift as content is loaded. (when you go back to the performance tab and refresh)

Layout shifts will then be highlighted in blue as you interact with the page.

3. Double-Check Your HTTP Headers & Review Unused Code

 it’s helpful to see the HTTP response codes for every page and resource.

Go to Network Tab

After selecting a resource, the Headers sub-menu in the Network tab allows us to see a host of information regarding the selected file. (headers appears when you click and choose a file)

This includes all HTTP header information, like the Request URL, the Request Method, the Status Code, content-encoding, last-modified date, server, and so much more.

You can lean on this info to:

  • Verify GZip compression is enabled.
  • Double-check that cache-control is working as expected.
  • Verify we’re sending Googlebot and other user-agents the appropriate status code.

Review Unused Code

Use the console tab

Refresh the page

Click “Issues” section, next to the filter:

chrome dev tools - console - issues

SearchEngineLand notes

  • View the DOM in the Elements panel, to make sure Google can see it

Use this to review the content of any of the page’s elements (such as the title, meta description or page text) to verify that the desired relevant information is shown in each case, to make sure it’s accessible to Google.

When identifying these differences between the content shown in both, you can then take the appropriate steps to verify it’s being indexed correctly: reviewing the page cached version in Google, verifying if the text is being shown in Google’s results when searching for it, using the “Fetch as Googlebot” in Google Search Console and so on.

3. Find Unused JavaScript & CSS

To look for unused JavaScript & CSS open the Chrome Web Devtools, go to elements and press ctrl+shift+P and type coverage; and then select [Show Coverage]

After selecting show coverage you will see the below screen, now you have to click on reload button as you can see in the screenshot and that will finally lead you to the coverage report that will show you the JS & CSS files.

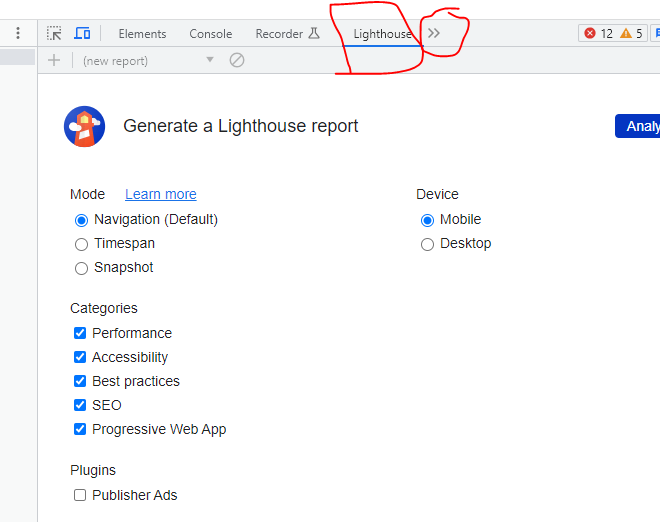
How to use Lighthouse in Google Chrome Dev Tools

Using Dev Tools Console Panel to Run JavaScript

Notes from Udemy course you can find here.

You can do a few nifty things, that seem a bit pointless at this point, like for example, calling and seeing how many paragraph <p> tags are on a page:

There are 5 paragraph tags, in the example shown above^

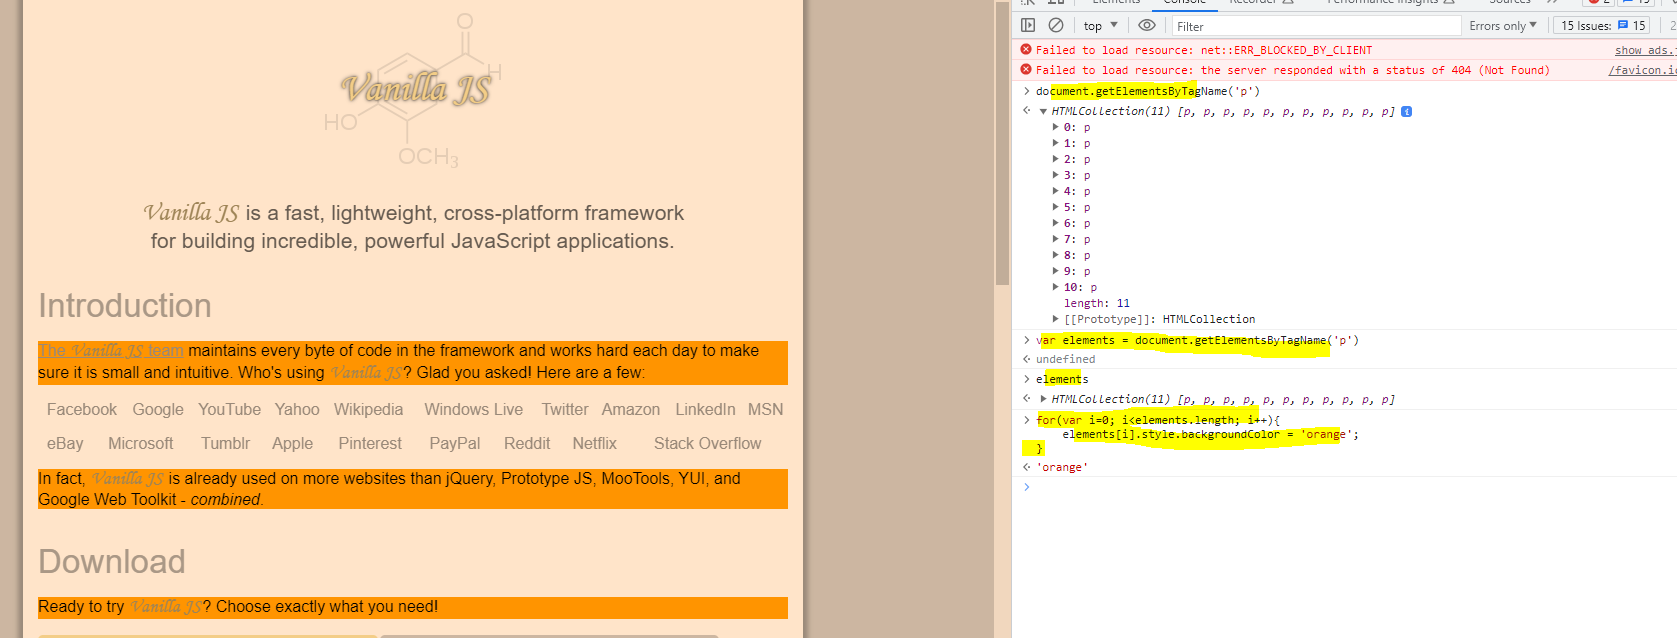
You can change the background colour of elements, like paragraphs:

Put the elements in a variable, and then change them with a loop^

Here i’ve changed the background colour of the paragraphs on vanilla-js.com:

Sources Tab & Basic Debugging

Right click on an element and select “inspect”

Go to the sources tab

You can click on lines of code to create a “breakpoint” so the code stops on that particular line of code

Breakpoints – pauses the code at a specific point

More info on setting up breakpoint to pause code in the Google documentation here

Line-of-code breakpoints

Use a line-of-code breakpoint when you know the exact region of code that you need to investigate. DevTools always pauses before this line of code is executed.

To set a line-of-code breakpoint in DevTools:

  1. Click the Sources tab.
  2. Open the file containing the line of code you want to break on.
  3. Go to the line of code.
  4. To the left of the line of code is the line number column. Click on it. A blue icon appears on top of the line number column.
A line-of-code breakpoint.

You can view the local and global scope of the code

The “Filesystem” panel, tells you all the files that make up the current page:

Official Google Documentation for Chrome Dev Tools

Google has their own info and tutorial stuff on dev tools here.

Some Tips from Reddit

document.body.innerHTML = [...document.getElementsByTagName("a")].map(el => el.href).join("<br>");

Note from video^

  • Elements tab – we can see HTML representation of DOM – check page elements are in the DOM
  • Network tab – see what happens between the server and our browser.
    Reload page – and see each request from the server and the response
    You can see where time is spent. We can see each element/request – we can see how long it took including the time the server and download took.
    We can also see http/response headers – make sure there’s no X-robots tags if you want it indexed
    You can click on an element/request, then click on “initiator” and see what requested it:

Network tab can also be used to disable the cache, set network speed and the user agent.

Please note that Googlebot might not always work as expected, real Googlebot will respect robots.txt and some sites might do IP lookups to see if a request is really from a data centre.

Some SEO Checks using Developer Tools:

Dev Tools Checks
Inspect main elements – are they visible in the inspect window? e.g. right click and inspect the Headings – check <head> has meta title and desc
Check on mobile devices
Check all the elements result in a 200 – view the Network tab
Network Tab – Check with Googlebot
Console tab – refresh page – what issues are flagged?
Unused JS in the elements tab – coverage
Check for client rendered links using the code above , using the console tab

You can also use a “diff tool” to check the difference between a live DOM copied from dev tools and the view source code.

Easy Way to Analyse DOM Size (For SEO Audits & Speed etc)

Add the chrome extension here – https://chrome.google.com/webstore/detail/dom-size-analyzer/mcneiimlodlbmohipgdbbglgbmaoojen

when you right click > Inspect

In the menu with the two arrows >> – you can click that and it has an option to analyze the DOM – which then gives you the number of elements and a few other bits

Just click the arrows, and then “Analyze DOM Size” and click the play icon

  • You can also right-click and inspect and type:

SEO Reports in Google Analytics 4 (GA4) [2023]

SEO Landing Page Report

Go to Reports > Engagement>Pages and screens

click the pencil icon to customize

Click Dimensions – search and add “Landing page + query string”

Delete other dimensions

Click APply

Click MEtrics

Remove “views”

Add “sessions”

Drag sessions to top.

Click Apply

Click “Add filter” on the right

Search for/add “session default channel group”

Tick “organic”

Click “OK”

Click Save on the top middle-right

Click “Save as new report”

Name is “Landing Pages – Organic” or something

To get the report to appear in the sidebar menu

Click Reports in the left-side bar and then “Library “

Under “life cycle”

click “Edit collection”

Click “Create New Topic”

On the right search for the Landing Page – Organic report

Drag it into the new SEO folder you made (sometimes this doesn’t work as GA4 has a bug at the time of writing)

It worked for me when I dropped it into the second rectangle

Click “back” on the top left

and you should now see an SEO section to the reports.

“SEO Report 2 – Devices or Organic Search Traffic

Go to the Reports>User>Tech >Tech details

Click the Pencil icon to edit the report

Add a filter

Add “session default channel group”

and then Tick “organic” (search for it, if it’s not there for some reason)

Go to Dimensions in the right side bar

Click the 3 dots next to “device category”

Choose “set as default”

Then drag “device category” to the top

Click “Apply”

Click “Save”

Save as a new report

Name it – “Tech details – Organic” or something

  • at the time of writing GA4 is buggy as f*ck, and it won’t let me save this report

Go back

Go to Reports > Library (folder icon near bottom)

Add to the Life Cycle collection

Drag the report into the SEO folder.

SEO Report 3 – Search Engines

Go to Reports>Acquisition>Traffic acquisition

Click the pencil icon to customise the report

Delete on the dimensions in the top right, except for “Session Source”

Click Apply

Add a filter – session default channel group and then select “organic Search”:

Go to reports – click “library” icon at the bottom

Edit the life cycle reports

drag in the new report to the “SEO” section you made for the first report

Google Search Console Reports

Link GA 4 to Search Console

Go to Admin (blue and white cog incon on bottom left of screen)

On the bottom right click “search console links”

Choose the account and web stream and you’re done.

You might need to wait 24 hours for the data to get imported.

Go to Reports > Library (folder icon near bottom)

Life cycle – edit collection

In the top right search for “Google”

You should see 2 reports – Google organic saerch traffic and Queries: organic Google search queries

Click Save – save current collection

SEO Behaviour Exploration Report

Go to “EXPLORE>Path exploration > Start over (top right)

Click the starting point and then select / for homepage

Filter to show organic traffic only

Go to SEGEMENTs (left hand side)

Click the + icon

Click “Session segment”

Click “Add new condition” on the left – add “session default channel group”

Add filter by clicking the box on the right – contains – organic search – click “apply”

Name is “organic search visitors” – “Save and apply”

You can’t add this report to the sidebar (sorry) – so to see it you’ll have to always click into the Explore section.