
Filters in Google Analytics
Filters allow you to choose to exclude or include different dimensions, like IP addresses
The most common filter, is one which excludes visits from the a company’s employees/internal traffic
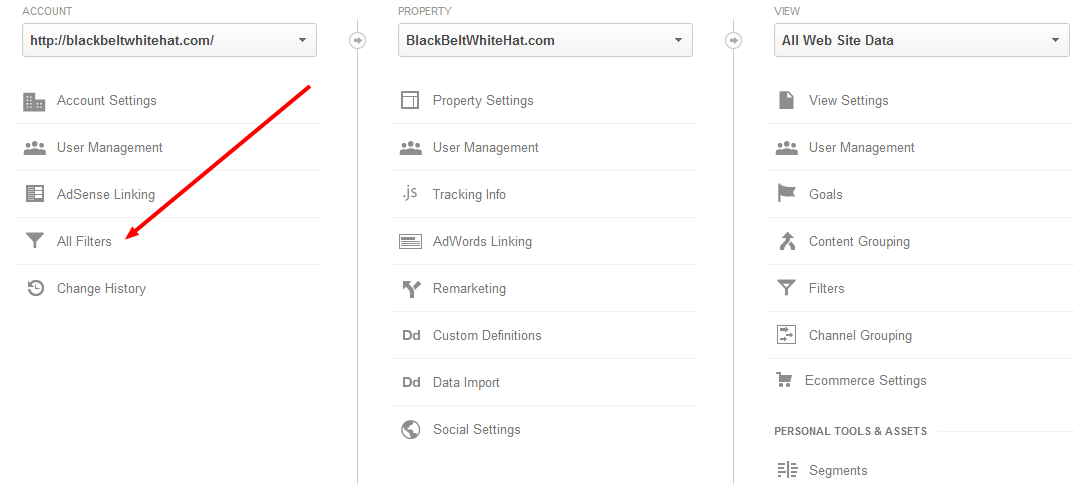
To apply this filter, log in to Google Analytics and click on the Admin button:

Then “Filters”

Then click “+New Filter”
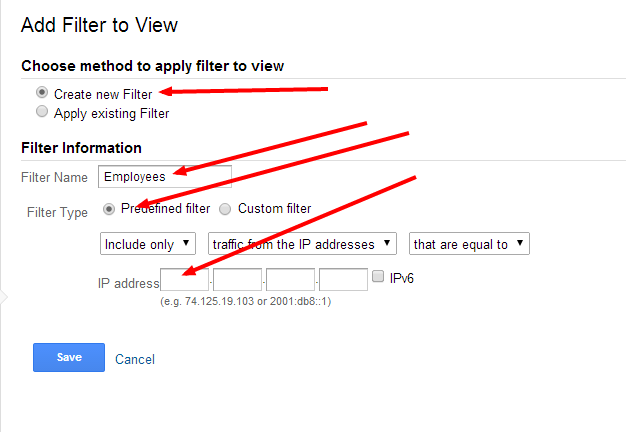
Then fill check “Create a new Filter”
Give the filter a name
Check “Predefined filter”
Then Exclude only – traffic from the IP addresses – that are equal to, and then type in your employer’s IP address in the boxes and click “Save”
It is possible to apply multiple filters
Filters are applied in the order that they appear
Filters are applied to “views” in Google Analytics
Apply filters to a test view first, in case you balls up your data
To see all your filters, go to Admin, and click “All filters” on the left hand side:
LowerCase URIs Filter
Google Analytics captures the data as it appears in a visitor’s browswer.
If a visitor gets to this site by typing http://www.BLackbeltwhitehat.com, it will appear as a different page in Analytics to http://www.blackbeltwhitehat.com
To add a filter to stop this happening –
Click “Admin” (on the top)
“All Filters” (on the left)
Then Add a Filter, give it a name, check “custom filter” and then “lowercase” and the Choose “Request URI” from the dropdown menu
Then click “Save”

Once you have a filter, you may want to create a new “View” that has that filter applied to it.
For example, you might create a filter that only includes data from the UK visitors/users.
To do this, in Admin, click on the drop down menu underneath “View” on the right hand side:

Then click “Create new view” at the bottom of the drop-down
Once a new view is created; on the right-hand-side of the Admin page, click “Filters”
then check “Apply existing Filter” and add filters to the view
