Scope and the Scope Chain in JavaScript

Scoping – where do variables live? – Where can we access a certain variable?

Notes from JS Udemy Course

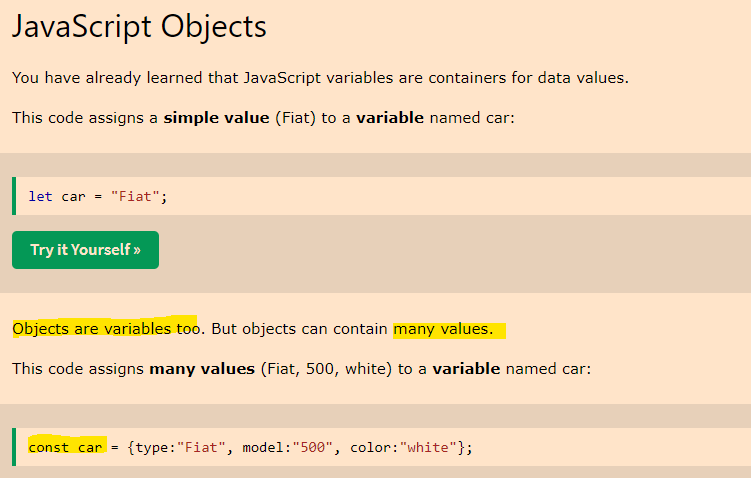
JS is a high level, object oriented multi paradigm programming language

Lexical scoping – scoping is controlled by placement of functions and blocks in the code

Scope is the space or environment in which a certain variable is declared.

There are 3 main types of scope for variables:

Global scope

Function scope

Block scope

The Scope of a variable, is the region of our code where a certain variable can be accessed.

Scope Chain in JavaScript

I asked Chat GPT “what is scope chain in JavaScript?”

A scope chain in JavaScript refers to the hierarchical order of scopes, with each scope having access to its own variables and those of its parent scopes.

This hierarchy is established based on where functions and blocks are physically located within the code (lexical scoping).

When a variable is referenced in JavaScript, the engine looks for the variable in the current scope.

If it doesn’t find it there, it moves up the chain to the parent scope. This process continues all the way up to the global scope if necessary. If the variable isn’t found in the global scope, a ReferenceError is thrown.

Here’s a simple example to demonstrate the concept:

let globalVar = "global"; // global scope

function outer() {
    let outerVar = "outer"; // outer function scope

    function inner() {
        let innerVar = "inner"; // inner function scope

        console.log(innerVar); // "inner", found in inner scope
        console.log(outerVar); // "outer", not found in inner scope but found in outer scope
        console.log(globalVar); // "global", not found in inner or outer scopes but found in global scope
    }

    inner();
}

outer();


In the above example, the inner function’s scope chain includes the inner scope, the outer scope, and the global scope. The outer function’s scope chain includes the outer scope and the global scope. The global scope is at the top of every scope chain.

The scope chain is fundamental to understanding variable lookup and closure behavior in JavaScript.

Hoisting in JavaScript

I asked chatgpt to explain hoisting to me:

In JavaScript, hoisting is a behavior in which variable and function declarations are moved to the top of their containing scope during the compile phase, before the code has been executed. This means you can use a variable or function before it’s been declared in the code.

However, it’s crucial to note that while the declarations (not initializations) are hoisted, the assignments are not. This is why a variable declared and initialized after it’s used will return undefined.

Here’s an example of hoisting with variables:

javascriptCopy codeconsole.log(myVar); // Output: undefined

var myVar = 5;

console.log(myVar); // Output: 5

In this example, the declaration (var myVar) is hoisted to the top of the scope, but the assignment (myVar = 5) is not. That’s why the first console.log outputs undefined, and the second outputs 5.

Now, let’s see an example with functions:

console.log(myFunction()); // Output: This is hoisted!

function myFunction() {
  return "This is hoisted!";
}

Here, the entire function declaration (including the body) is hoisted, so you can call the function before it's declared in the code.

However, if we use function expressions and try to call it before it's defined, it will return undefined because only declarations are hoisted, not initializations:


console.log(myFunction); // Output: undefined

var myFunction = function() {
  return "This is not hoisted!";
}

In JavaScript ES6, let and const were introduced, which have different scoping rules from var. While var is function-scoped, let and const are block-scoped. However, they too are hoisted, but due to a mechanism known as the Temporal Dead Zone (TDZ), you cannot access them before declaration.


console.log(myVar); // Output: undefined
console.log(myLet); // ReferenceError: Cannot access 'myLet' before initialization

var myVar = 5;
let myLet = 10;

In this code, trying to log myLet before it's declared results in a ReferenceError, while myVar is undefined due to the hoisting and the difference in behavior between var and let/const.

Then I asked Bard:

JavaScript hoisting is a concept that refers to the fact that variable declarations are moved to the top of their scope before the code is executed. This means that you can access a variable even if it is declared after the line of code where you first try to use it.

For example, the following code will print “Hello World!” even though the message variable is declared after the line where it is first used:

JavaScript

console.log("Hello World!");
var message = "Hello World!";

This is because the JavaScript engine will hoist the variable declaration to the top of the scope, before the code is executed. This means that the variable will be defined and accessible even though it is declared after the line where it is first used.

It is important to note that hoisting does not affect the value of the variable. In the example above, the value of the message variable will still be “Hello World!” even though it is declared after the line where it is first used.

Hoisting can be a useful concept to understand, but it can also lead to errors if you are not careful. For example, the following code will throw an error because the message variable is not defined when it is first used:

JavaScript

var message = "Hello World!";
console.log(message);

This is because the message variable is not defined until after the line where it is first used. To avoid this error, you should always declare variables before you use them.

Here are some tips for avoiding errors when using hoisting:

  • Always declare variables before you use them.
  • Use the const keyword to declare constant variables.
  • Use the let keyword to declare local variables.
  • Use the strict mode to prevent errors from being thrown when variables are not declared.

I hope this explanation of JavaScript hoisting was helpful. Please let me know if you have any other questions.

Source HTML vs Rendered HTML

Summary

For an SEO Audit

You want to check that href links and H1s etc are in the source and the rendered HTML

  • Rendered HTML, is basically HTML after all the JS has run.

You can view rendered HTML using right click and “inspect” from the drop down menu
This shows the Live DOM, which includes changes made by JavaScript.

  • Source HTML is static HTML, as it was sent from the server to your browser.

This is the raw HTML before anyclient-side JavaScript has been run/executed.

You also want to check that the rendered HTML is not too different to the source HTML.

View the site with JS turned off. Ideally images should still be there and href links should definitely still work with JS turned off.


Rendering process – start with the source HTML and CSS.

The browser parses the source html and CSS which creates the DOM and CSSOM.

The DOM is more important for SEO

The browser creates a DOM tree to identify elements on the website and where everything belongs and relates

The browsers takes the DOM and CSSOM and creates a render tree to lay everything out.

The tree is then used to create the actual pixels and layout of what you see.

JS may then be added to manipulate the DOM

You can turn the final DOM Tree, back into HTML – this is Rendered HTML

When you click View Source in your browser

This shows the SOURCE HTML

Developer Tools – Sources – SOURCE HTML

Network Tab in developer tools – SOURCE HTML

In the elements tab in Chrome in Dev Tools – you get the current DOM Content

https://support.google.com/webmasters/answer/11626894?hl=en

Overview

When you visit a page, the website sends HTML code to your browser. Often this source code includes additional resources such as scripts, which must be loaded, and which may alter the page code.

How to view Source HTML (Ctrl + U)

Right-clicking “show source” typically shows only the original page code returned to the browser, before scripts and other resources have been loaded and run. But there are many instances, particularly when troubleshooting your page, when you need to see the code of the final, rendered page on the browser, after all resources have been loaded, and any scripts run. For example:

  • To search for Google Analytics or Google Tag Manager tags used in verification.
  • To debug page loading and display (that is, to check that all libraries and other resources that you want to be loaded are).
  • To look at structured data on the served page.

How to view the rendered source (Inspect Element)

Here are a few methods to view the rendered source code for a web page:

  • In the Chrome browser: Right-click any part of the page and select Inspect to see all the HTML from the rendered page. Search for items in the rendered HTML with Control + F (Windows) or Command + F (Mac).
  • For a page on your own site:
    1. Inspect the URL, either by entering the URL directly in the URL Inspection tool, or by clicking an inspection link next to a URL shown in most Search Console reports.
    2. Click Test live URL > View tested page.
    3. The HTML tab shows the rendered HTML for the page.
  • For a page on any site, not just a site that you own:
    1. Open the Mobile-friendly Test.
    2. Enter the URL of the page. The page must be available to Google without a login, and not blocked by robots.txt.
    3. Click View tested page.
    4. The HTML tab shows the rendered HTML for the page.

Creating an Actionable 404 Report from Screaming Frog

Update – I don’t think all the process below is required.

Just download the 404 – inlinks report from Screaming Frog

Bulk Export (very top, slightly to the left on the GUI)> Response Codes > Internal > Client Error 4**s

Copy the “Destination” (column C on report) column and paste into an new Excel tab/sheet and remove duplicates

In the first sheet, copy and paste the source column into column D

In the second sheet, do a vlookup using the first destination URL, and “lookup” in the first sheet – columns C and D, to return the relevant source URL

Copy the vlookup and Paste – values – into column A into the second sheet

You can also copy and paste the anchor text and location into column C

Follow this protocol, to produce a sheet you can send to devs etc, to remove 404s

  • This will get rid of the site-wide 404s and some individual 404s

Run a crawl with Screaming Frog

Export the report –> Screaming Frog – Bulk Export  – Response Codes – Internal – Internal Client Error (4xxs)  (check 500s too)

In Excel – Copy and paste the “destination” URLs into a new sheet – into column A

Remove duplicates from the destination URLs that you’ve just copied into a new sheet

rename the colum – 404s Destination

  • Copy and paste the Source URLs and the Anchor Text into a new sheet.

Paste Source URLs in column A, and Anchor Text into column C

In cell B1 type – ” | ”

In cell D1 – give the column the heading “Source | Anchor”

In cell D2 concatenate – =CONCATENATE(A2,$B$1,C2)

Drag the formula down.

You’ll now have the anchor text and the source URL together, so you can vlookup the destination (404) URL

  • create a new sheet
  • Copy and paste all of the source URLs | Anchor Text (from the concatentate formula – paste special -values only
  • Copy & Paste Destination URLs from the original sheet into columns B and C in the new sheet you just made.


You need “destination” in column B and “Source | Anchor Text” in column C, as vlookup has to go left to right

  • So you’ll have – 404s Destination – Destination – Source | Anchor Text

Name column D in the new sheet “Example Source URL & Anchor Text” and in cell D2 enter the lookup – VLOOKUP(B2,B:C,2,0) (put “equals sign” before the V. Drag the formula down

Copy column A and paste into a new sheet. Name the sheet “Final”.

Copy column D with the vlookup and paste values into column B in the “Final Spreadsheet”

In “final”, you should now have all the unique 404s and an example of a page that links to those 404s with the anchor text.

  • You can use “text to columns” to seperate the source URLS and anchor text if you wish
  • If you’re sending the spreadsheet onto a dev or someone to fix the 404s, you are probably best sending the full sheet with all the inlinks to the 404s, plus the one you’ve just made. It depends how they go about fixing the 404s.

    Once 404s have been fixed, rerun a crawl and recheck them.

look out for 404s that are classed as  HTTP Redirects in the “type” column – these don’t seem to have a unique source URL. You may have to search for the URL in the search box in Screaming Frog and click the “inlinks” tab to see original link to the non-secure http page

If you like, before you send off the report to someone, you can double check the “destination” URLs definitely are 404s, by pasting them into screaming frog in “list” mode

Deleting a webpage – 404s and that

Had to do this today, would have helped to have a bit of a process written down…

  • Check if page ranks for anything
  • if it does, then consider redirecting (301ing) to most relevant/related page (in regards to what it ranks for)
  • 410 is better than 404 according to Yoast – for a deleted page
  • Remove internal links from page copy etc and menus (crawl site if poss)

https://yoast.com/deleting-pages-from-your-site/

JavaScript – What is the DOM & DOM Manipulation? [2023]

The Document Object Model – is a structured representation of an HTML document.

You can use the DOM to “connect” HTML to CSS and JS.

The DOM is often said to have a tree structure or a hierarchy like a family with children and parents

Image source

Selecting & Manipulating Elements with JavaScript

You can use “document” to ‘enter’ the document – as in the top level of the HTML document as shown in the tree diagram above.

  • use “querySelector” to select a specific element in the DOM.

For example document.querySelector(‘.message’).textContent

Will select the text content of the element with the class of “message”

Once you have selected the content, use the equals sign = to update it.

document.querySelector(‘.message’).textContent = ‘Correct Number!’

The ‘code’ on the line above, will change the text-content found in the element .message to “Correct Number!”

“textContent” will only work if the element is something like a paragraph, that holds content.

If you have a value input field, like on a form or something similar, you may have to use .value instead of .textContent

document.querySelector(‘.guess’).value = 23;

The code on the left, adds “23” as the input value to the form/input field on the right^

Screenshot from The Complete JavaScript Course

Handling Click Events

In this example, the button has a class of “check”

document.querySelector(‘.check’) – will select the button with the class of “check”

Then we need to use the addEventListener() method. The addEventListener method, basically looks out for events such as button clicks.

Image Source

Event Listener ^looks out for events such as button clicks.

We can add the event we want to look out for, in this example a click:

addEventListener(‘click’)

  • Now we need to tell the event listener what to do what it observers a click

addEventListener(‘click’ function () {
console.log(document.querySelector(‘.guess’).value);});

The code in bold, will take the value from the element called “guess” and print it to the “console.log”.

Screenshot from The Complete JavaScript Course

The code above prints 9 to the console.log

the element with the class of “guess” is the form input field containing the number 9:

Adding “Game Logic”

The aim of game in the screenshot above – guess the secret number

We need to randomly create a number and then tell the user when the number they guess is too high, too low or correct.

  • Producing the secret number

const number = (Math.truncMath.random()*20)

Math.random gives a number between 0 and 1

Match.trunc rounds up or down the number to the nearest whole number.

Multiplting the random number by 20 makes the number, well, larger

  • Checking the User Input Vs the Secret Number

if (!guess) {

document.querySelector(‘.message’).textContent = ‘No Number’;}

else if (guess === secretNumber) {

document.querySelector(‘.message‘).textContent = ‘Correct Number!’;

}

The code above will print “No number” if a number isn’t entered into the relevant form field.

if the number entered (the guess), is equal to the secretNumber – then the code will print “Correct Number!” – to the element with the class of “message“.

What if the guess is greater than the Secret Number?

else if (guess > secretNumber) {

document.querSelector(‘.message’).textContent=’Too high!’

and if it’s too low:

else if (guess < secretNumber) {

document.querSelector(‘.message’).textContent=’Too low!’

So all the code together will look like:

Adding a Score to The Game

The score will start at 20 and decrease for every wrong guess.

So, if the user guesses too low, reduce the score by 1

We also need to add a variable for the original/starting score, after the secretNumber is declared (or the code to create the secretNumber anyway)

Declare the score with:

let score = 20;

The score is part of the “application state”. The score is available in the code and not just in the DOM

Game Over

To tell the player when they’ve lost the game, we need to add a condition related to the score variable:

if (score > 1) {

https://www.udemy.com/course/the-complete-javascript-course/learn/lecture/22648419#learning-tools

Manipulating CSS When Player Wins- Change Background Colour

First select the whole <body> element

document.querySelector(‘body’).style.backgroundColor = ‘#60347’;

Implementing a High Score ‘Box’

Just like the regular, current score, we need to store the high-score in a variable.

use the code

let highscore = 0;

We need to check if the current score is greater than the existing game’s score

if (score > highscore) {

highscore = score;

}

Assuming the “HighScore” Box has already been made – we need to check what the class is.

In the this case, the class = “highscore”

Now we need a way to update the highscore, when the current score is greater.

document.querySelector(‘.highscore’).

textContent = highscore;

https://www.udemy.com/course/the-complete-javascript-course/learn/lecture/22648427#learning-tools

Getting Rid of Duplicate Code (DRY Principle)

The code if the guess is too high, or if the guess is too low code is pretty much duplicate code

Remember

Dont Repeat Yourself DRY

There’s no problem starting out with repeated code, and then refactor the code once it’s all working

  • ID duplicate or close-duplicate code
  • Refactor the facker

Change the code above, to a “when guess is wrong” code block.

Use a ternary operator

While Loops in JavaScript

A while loop is more versatile than a for loop.

A while loop just needs a condition to keep running.

Creating a while loop

  • Add a condition.

for example

while ((rep<=10)

Run the look while the “rep” value is less than or equal to 10

  • Add the staring condition:

let rep = 1;

  • add the code to be executed:

console.log(‘lifting weights repetition ${rep}

  • Add the counter:

rep++;

let rep=1;
while (rep <=10) {
console.log('lifting weights repetition ${rep});
rep++;
}


While Loop doesn’t need a counter

Random variable – throwing a dice until we throw a 6

We don’t know how many times the dice has to be thrown, so we don’t need a counter

let dice = Math.trunc(Math.random() x 6) + 1;
console.log(dice);

while (dice !==6) {
console.log('Your rolled a ${dice}');
}


while (dice !==6) is the condition – roll the dice whilst the condition is not equal to 6

Making CSS Padding Responsive [2024]

  • TLD;R – I just set everything in “rem” units instead of pixels and it keeps padding etc relatively-relative on all devices

First – you may want to use “padding-block:” – which is the padding for the top and the bottom only.

You can also use a “min()” statement or line of code, or whatever it’s called in CSS

If you type:

section {

padding-block: min(10vh, 10rem)

Min, Max & Clamp

Min

To use “min” – you may for example have a back-ground colour, with width:70% and max width:500px

width: min(500px, 70%)

Min will “look” for the smallest value – either 500px, or 70%

Min will choose the smallest value.

If you are on a mobile for example, 70% width, is less than 500px – so on mobile the background will be 70% of the viewport for a mobile.

If you are on a desktop computer, 500px will be less than 70% of the screen width – so the background will be 500px wide.

Responsive Equal Padding Top & Bottom

If you wanted to pad the top and bottom of text in the background:

padding-block: min (30px; 10%) ;

Max

width: max(500px, 70%)

max is the opposite – now it will use the maximum value.

on Mobile, 500px will be the largest

On Desktop – 70% will be the largest.

Padding with a Percentage

Calc Rem + VW

Yet another way to add padding, is to use “calc” and then add parameters/values for rem and vw

Rem (short for “root-em”) units dictate an element’s font size relative to the size of the root element. By default, most browsers use a font size value of 16px. 

The full form of VW is viewport width. It works like the percentage unit. Specifying 10vw is equivalent to occupying 10% of entire visible screen width.

This code works okay by the looks of it:

padding-block: calc(0.75rem + 0.5vw);
padding-left:  calc(0.75rem + 0.5vw);
padding-right: calc(0.75rem + 0.5vw);

Image & Text Aligned Side by Side Using CSS Grid

Here’s an example, that uses “padding: 2rem;” and “gap: 1rem:” to space the image and the

If you click on the CSS tab/button – everything below @media, is to provide a separate style and effect on mobile devices

To be honest, I having got a fecking clue with CSS Grid, I need a refresher – here’s a blog post I did earlier – https://businessdaduk.com/2022/11/21/css-grid-for-beginners-2022/

JavaScript – the for Loop [2023] for beginners/dummies/SEO-helmets

A for loop, is a loop that will loop through (go through) the elements in an array or the properties of an Object.

You can use it to update arrays, count the number of elements etc

Loops can execute a block of code several times.

With arrays, it’s common(ish) to run the same code over with a different value.

Image source

screenshot source

For Loops tend to be used with arrays (I think!)

The code below the array in the screenshot below, starting with “for”, loops through the variable called “names” above it.
Once it loops through it create “name” and then “console.log(name);” will get it to print on the console.log screen

  • console.log just provides a way of testing and outputting stuff using web developer tools, inspect element etc.

The code below, will do the same as above, but this time it will add “Hello there” before each of the names:

You can also add if conditions. For example, in the code below, the loop will check if “Maria” is in the list, and if so, will print out “Maria is in my list”

You can get the loop to stop once it finds “Maria” by using the “break” keyword.

The above code will print “Ed, John and then Maria and “Maria is in my list”. It will then stop and it won’t print all the names up to “Potter”.

As well as using the for loop with arrays, you can also use it with a single variable like “age”, and add an incremented – for example “age++”

The code shown below will print out and loop 10 times. starting at 0, and then 1, 2 etc. until finally the condition age <10 is no longer met

When the age is 10, it will stop.

A web dev example

Get all the links on a page, and return the number of the links on the page.

When the loop gets to the 6th link, it is no longer less than links.length, and so the loop stops:

(you can click the image to see a lager version, the important code is :

for (i = 0; i < links.length; i++)

To print out the final link, change “<links.length” to “<= links.length” – meaning “less than or equal to links.length”

for (i = 0; i <= links.length; i++)

For In Loops

For in loops, are the same as for loops except they are shorter to write but less flexible.

For Loop Example with an Array

Work out the age of people, given an array with their year of birth in it.

start with the array and then a new array, which will hold the ages:

const years = [1991, 2007, 1969, 2020]
const ages = [];

for(let I = 0; I <years.length; i++) {

ages.push (2023 – years [i] );

}

console.log(ages);

the “ages.push” code, will psh the results into the ages array

Continue & Break Statements

Continue is to exit the current iteration and move to the next one

Break will exit completely.

You can use with an if statement

continue loop statement

If the type of the current element, is not a string, then continue.

This will skip any elements/values that are not strings. Continue will exit the current iteration and not print to the console.log

Using break, will terminate the loop completely.

break loop statement

What are objects in Javascript? [2023]

Notes taken from the Udemy Course – the Complete JavaScript Course which you can enroll on here.

I’ve also robbed some screenshots from other sites, but linked to them in the “source”.

  • An object is a collection of properties
  • A property is an association between a name (key) and a value
  • A property’s value can be a function (but then it’s called a “method” for some reason)

Source

Objects provide a way to group values together in an organised fashion.

Objects can store lots of different types of data.

Objects can contain variables, functions or both.Variables found in objects are properties, while functions are methods.

In objects we define key-value pairs. The key is also called the “property name”.

Objects are normally declared within culry braces:

firstName is a “key” and the “value” is “Jonas”.

The name and the value, create a “key value pair”.

There are many ways of creating objects in JavaScript.

Using curly braces is called the “object literal syntax” because you’re writing down the literal object.

The order you write down objects doesn’t matter, unlike in arrays.

How do we get data from an object?

Dot Notation

Screenshot source

The first way to access data in an object is to use “dot notation”:

Dot notation is the most popular method to access the properties of an object.

let obj = {
  boxer: 'jab',
  muayThai: 'kick'
};
let strike = obj.boxer;
console.log(strike);
// jab

The dot notation in the example above is – let strike = obj.boxer;

Specify the name of the object, then add a dot, followed by the property name.

The syntax is objectName.propertyName;

Source

Bracket Notation

let obj = {
  boxer: 'jab',
  muaythai: 'kick'
};
let strike = obj['boxer'];
console.log(strike);
// jab

You can read a much better article about dot and bracket notation – here –> codeburst.io or here —> plainenglish.io

How do you create objects?

It is a common practice to declare objects with the const keyword.

There are two methods by which you can create an object: an object literal and the object constructor. 

Source

let’s create an object named myCup and give it properties named color, volume, and weight as follows:

let myCup = new Object();
myCup.color = "transparent";
myCup.volume = 1;
myCup.weight = 0.5;

We can write the same object in a shorter notation. Comma-delimited list of  pairs of property names and associated values, enclosed in curly braces:

let myCup = {
 color: "transparent",
 volume: 1,
 weight: 0.5
}


Above, we declare a variable in the same way with: let myCup equals and then curly brace.

source

If you are making multiple objects, it’s best to use the object constructor.

You can use a constructor to create a new object by calling the constructor with the new keyword. The new keyword will create an instance of an object and bind the this keyword to the new object.

The this keyword is a reference to the object itself.

function Fighter(name, age, nationality) { 
    this.name = name; 
    this.age = age; 
    this.nationality = nationality; 
    this.bio = function () { 
        console.log(`My name is ${this.name}. I'm ${this.age} years old. I'm from ${this.nationality}`) 
    } 
};

const oladele = new Profile("Izzy", 29, "Nigeria" );
console.log(oladele.bio()); //My name is Izzy. I'm 29 years old. I'm from Nigeria

More info about constructors at Freecodecamp.org

Here’s another example, using the this keyword from w3schools

<script>
// Constructor function for Person objects
function Person(first, last, age, eye) {
  this.firstName = first;
  this.lastName = last;
  this.age = age;
  this.eyeColor = eye;
}

// Create a Person object
const myFather = new Person("John", "Doe", 50, "blue");

// Display age
document.getElementById("demo").innerHTML =
"My father is " + myFather.age + "."; 
</script>

The above code gives the output “my father is 50”. (which is printed to the paragraph with the id of “demo”)

Adding a method to an object

We can add a method simply by adding another property that is a function. This function will be able to read the values of the object and work with them.

We will add an example that will print out the color of the table.

myTable.whatIsMyColor = function() {
 console.log("My color is: " + this.color);
};

source

source

Adding a new property to an object

In JavaScript you can add a property to an object after it has been created.

The following statement adds the age property to the fighter object and assigns 22 to it:

fighter.age = 22;


Deleting a property of an object

Simply use the delete operator

delete fighter.age;

Checking if a property exists

To check if a property exists in an object, you use the in operator:

propertyName in objectName

The in operator returns true if the propertyName exists in the objectName.

The following example creates an employee object and uses the in operator to check if the ssn and employeeId properties exist in the object:

let employee = {
    firstName: 'Peter',
    lastName: 'Doe',
    employeeId: 1
};

console.log('ssn' in employee);
console.log('employeeId' in employee);Code language: JavaScript (javascript)

Output:

false
true

Source

Javascript Arrays for Beginners (2023)

Arrays hold values.

An array is an ordered list of values.

Arrays are 0-based, in that the first value is 0, not 1 in terms of its position.

A JavaScript array has the following characteristics:

  1. First, an array can hold values of mixed types. For example, you can have an array that stores elements with the types number, string, boolean, and null.
  2. Second, the size of an array is dynamic and auto-growing. In other words, you don’t need to specify the array size up front.

source

W3schools describes an array as a “special variable, which can hold more than one value”.

An array can hold many values under a single name, and you can access the values by referring to an index number.

arrays w3schools

source

Creating & Fetching JavaScript arrays

JavaScript provides you with two ways to create an array. 

It is a common practice to declare arrays with the const keyword.

Image source

You can also use the following code to create a new array:

let values = new Array();

or

let values = [item1,item2,...]

Once you’ve created your array, you can print the values to the console.log with the code:

console.log(values);


With “values” being the name of the array.

You can call “values.length” to get the length of the array

console.log(values.length);

Again, in the above code “values” is the name of the array.

You can define and name an array, and then “push” values into it later:

The above code will add a single value of 5 to the array named “values”.

console.log(values[1]); will print the second value – 7

console.log(values[0]); will print the first value – 5

In summary – to create an array, it’s generally best to use the “const” keyword, or the “new” keyword.

Adding & Changing Stuff Within Arrays

Below, the array name is used,and the variable number to update, the first variable.

You can try it yourself on the w3 schools website.

Accessing Arrays

You access an array element by referring to the index number:

accessing arrays

You can also loop through arrays